CRMs
MagicBlocks integrates seamlessly with HighLevel and HubSpot to deliver qualified contacts — along with rich conversation context — directly into your CRM.
Your AI Agent handles the conversations. Your CRM handles the follow-through.
HighLevel CRM
Looking to automate contact capture and deal flow into your HighLevel CRM?
This guide walks you through how to connect MagicBlocks with HighLevel, so every qualified contact is instantly delivered without manual work or missed opportunities.
Let your AI Agent work the contacts. Let HighLevel close them.
Why Connect MagicBlocks to HighLevel?
By integrating MagicBlocks with HighLevel, you can:
- Auto-send qualified contacts directly to HighLevel
- Assign them to the right contact and pipeline
- Map important data fields like phone and email
- Eliminate contact loss from manual handling
More info on how to connect MagicBlocks to HighLevel
Step-by-Step: Connect HighLevel to MagicBlocks
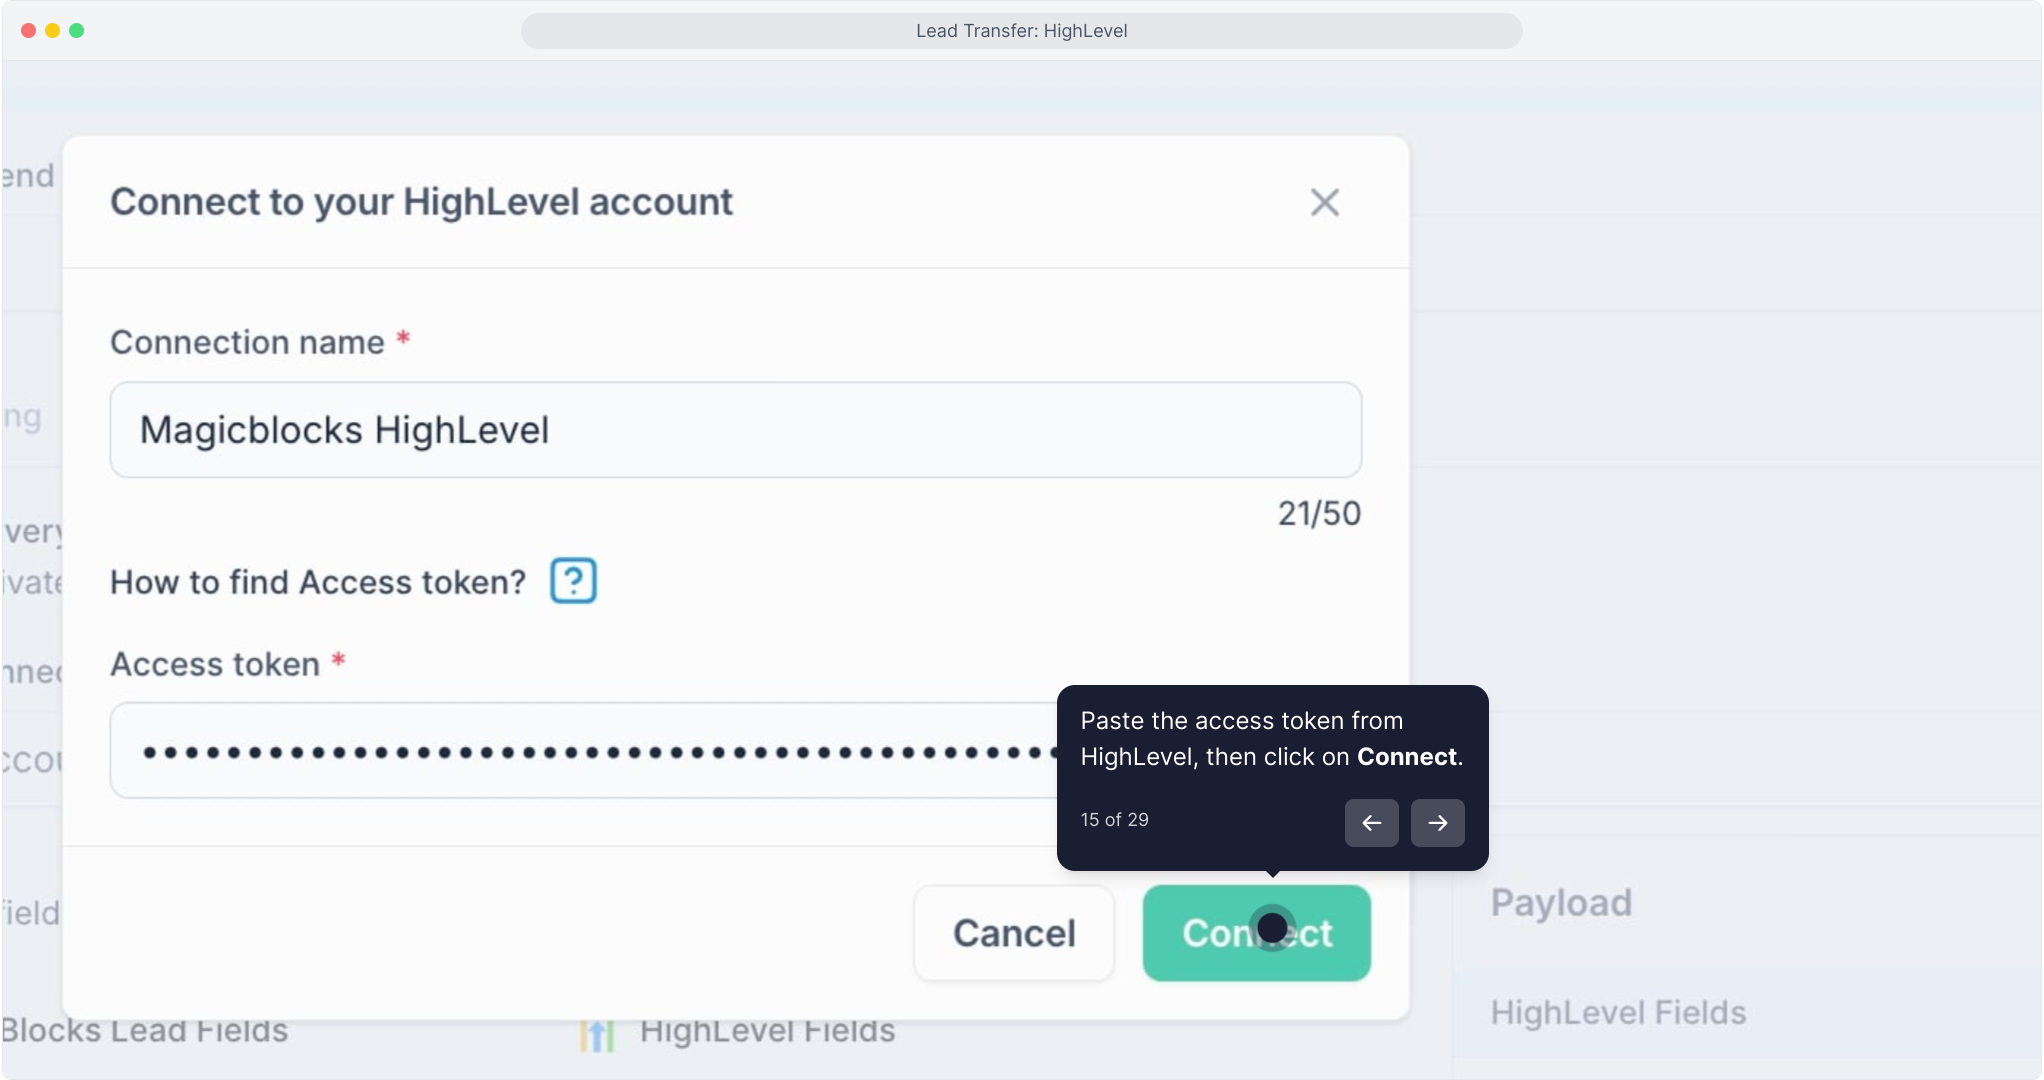
Choose when to transfer contact
Select the moment when the Agent should send contact data. You have two options:
- Session End — sends at the end of every conversation.
- Goal — sends only when a specific Goal is achieved.
Using Goal gives you the most control because handover happens only when a user is qualified.
Select from Goal
Choose the specific Goal that should trigger the transfer.
Your options may include:
- Session Booked
- Contact Captured
- Hook Engaged
- Human Handover
- Follow Up Needed
- Action Pitched
- Contact Created
For example, if you choose Follow Up Needed, the contact is pushed to HighLevel only when the Agent reaches that point in the journey.
Min user messages
Set the minimum number of user messages required before the handover activates.
This helps prevent accidental or empty submissions.
Setting it to 1 is usually enough.
Delivery method
Select the HighLevel tab to configure CRM delivery. (Other tabs include Email, HubSpot, and Webhook.)
Active toggle
Turn the HighLevel handover ON.
If it's off, the rule will never fire even if all conditions are met.
Connected HighLevel account
Pick the HighLevel account you want to send contacts to.
If none is connected yet, you must connect one first.
Fields mapping
Map your MagicBlocks fields to the corresponding HighLevel fields.
Example:
- Phone → Phone
- Email → Email
You can add more fields and map them to custom HighLevel fields as needed. You can choose from the following built-in data fields:
- Agent ID
- Channel
- City
- Contact ID
- Country
- Email Address
- First Name
- Middle Name
- Last Name
- Phone
- Is Test
- Inquiry Message
- Last Message
- Session ID
- Summary
- Transcript
New:
- Flexible Transcript Mapping: User can now hand over conversation transcripts by mapping the MagicBlocks “Transcript” field directly to Contacts in HighLevel.
- Automatic Note Creation: Any MagicBlocks field mapped to “Note” will now generate individual notes in HighLevel during contact transfer.
On the right side, you’ll see a live payload preview showing how your final data will look before being sent.
Flow: How to Set Up HighLevel Handover
1. Open Contact Transfer
Inside your Agent, open Contact Transfer and create or edit a handover rule.
2. Choose “Goal” as the trigger
This ensures contacts are only sent when a meaningful event happens.
3. Pick the Goal
Select the Goal that signals your contact is ready for HighLevel — e.g., Contact Captured, Follow Up Needed, or Session Booked.
4. Set minimum user messages
Add a buffer so the user must send at least one message.
5. Switch to the HighLevel tab
Enable the Active toggle.
6. Pick your HighLevel account
Choose from your connected accounts.
7. Map your fields
Connect MagicBlocks fields (name, phone, email, service of interest, etc.) to HighLevel fields.
8. Review the payload preview
Confirm that the sample data matches what you want to send.
9. Save
Save your configuration to activate it.
10. Test
Trigger the Goal in a test session and confirm the contact appears in HighLevel.
What You Get After Setting It Up
Your AI Agent will automatically:
- push qualified contacts into HighLevel
- include mapped contact details and custom fields
- trigger follow-up automations instantly
- eliminate manual data entry
- ensure sales doesn’t miss high-intent users
It’s a smooth pipeline from conversation → qualification → CRM.
This video will explain the step-by-step process on how to integrate HighLevel to your MagicBlocks AI Agent:
How to Find Your HighLevel API Key
Your API Key is what connects MagicBlocks to your HighLevel account. Here's where to find it:
Log into HighLevel
→ Visit your workspace at gohighlevel.com
Go to Settings
→ Bottom left panel
Click Business Profile
Scroll to the top section labeled API Key
Copy the key
→ It starts with eyJ...

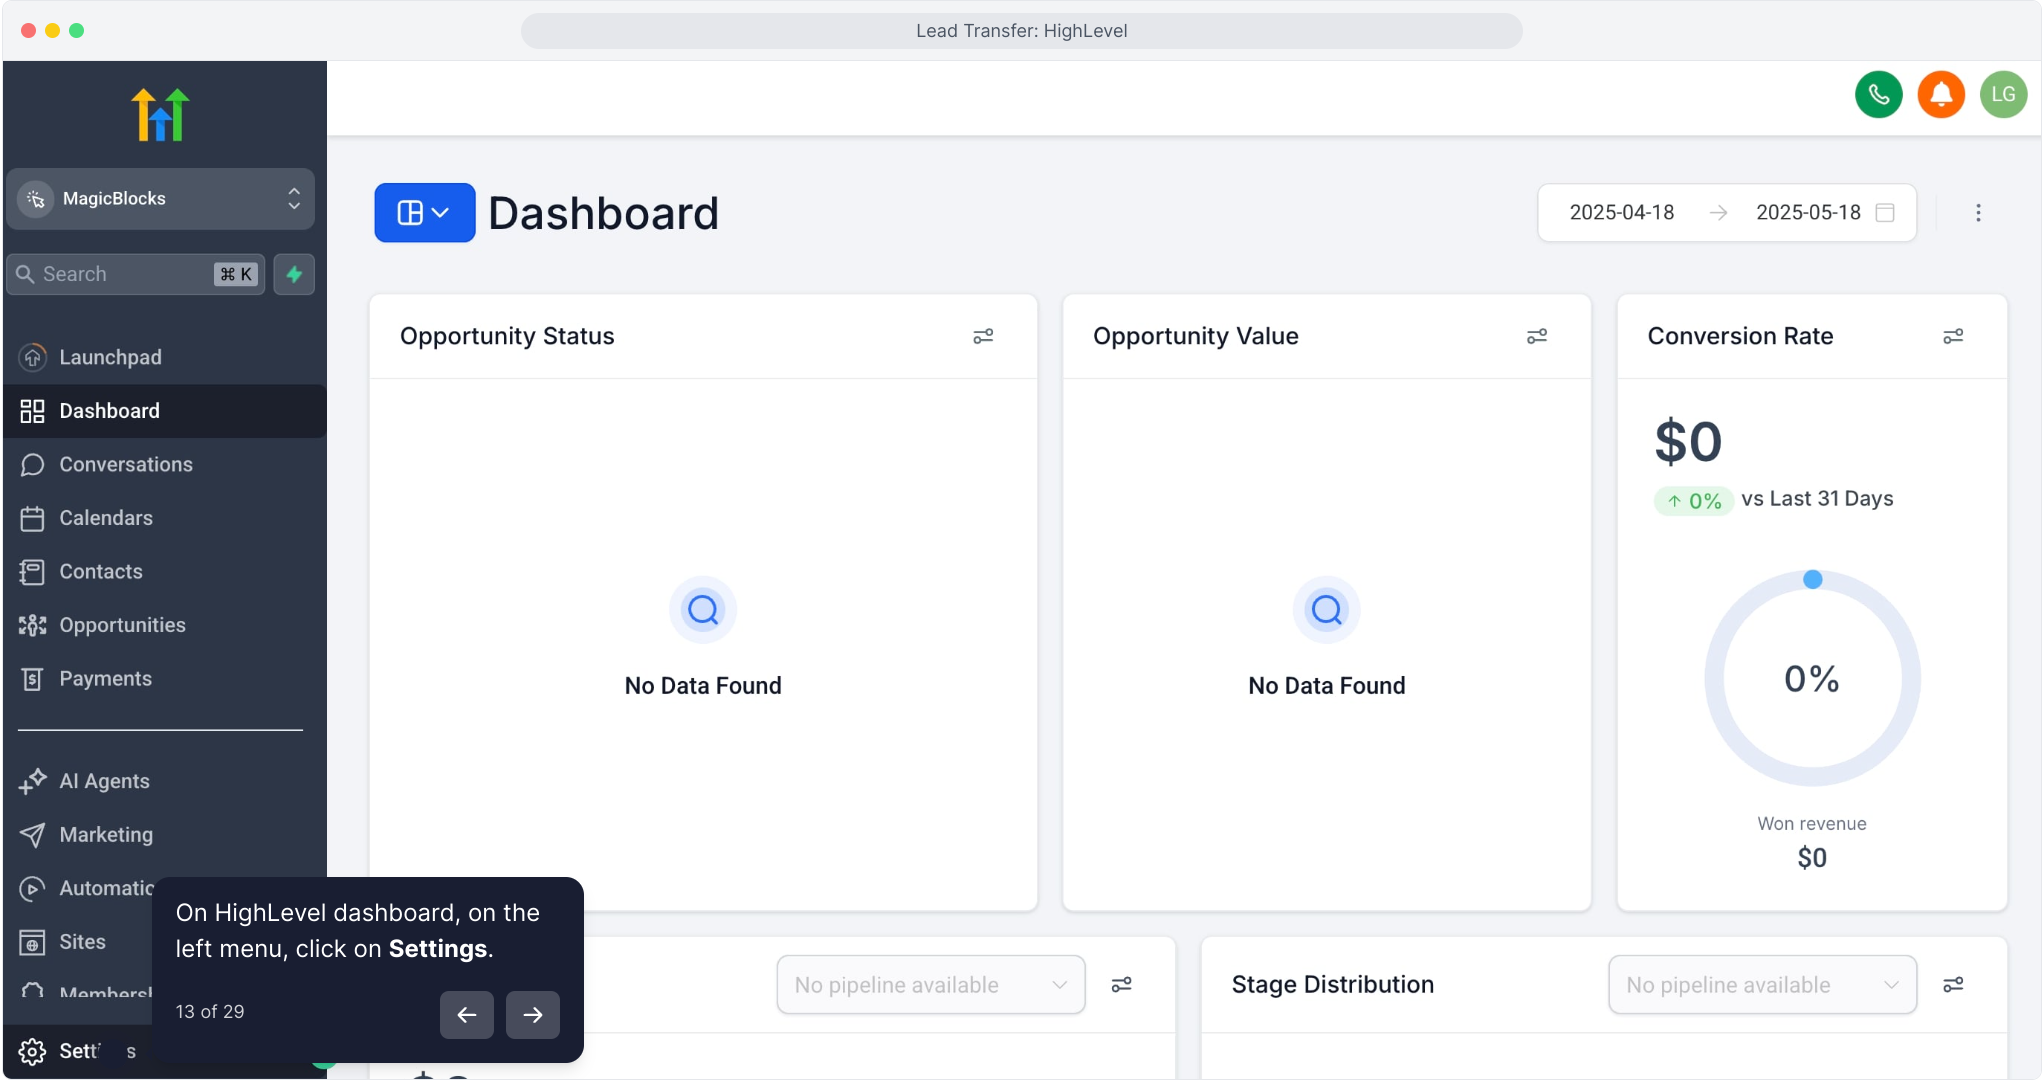
4. Paste the API Key into MagicBlocks
Give your connection a name (e.g., "HighLevel Sales")
Paste the API Key
Click Connect
Once connected, your HighLevel account will show up in the dropdown.
You’re Now Connected to HighLevel!
Now you can toggle on “Activate” and continue with deal and data mapping.
Map Your Fields
MagicBlocks lets you map each captured contact field to its HighLevel equivalent.
Example mapping:
- Phone ➡️ Phone
- Email ➡️ Email
- Click + Add fields to include custom fields like Name, Company, Zip Code, etc.
Test the Integration
Click Test Post to simulate contact delivery.
On the right, you’ll see a sample Payload with mapped data:
Phone: 8174489760
Email: [email protected]
All Done!
Your MagicBlocks AI Agent now sends contacts directly into your HighLevel CRM at the exact moment you choose, no extra effort, no copy-pasting.
HubSpot CRM
Want your contacts to flow straight from your AI Agent into your CRM without lifting a finger?
This step-by-step tutorial shows you how to connect your MagicBlocks AI Agent to HubSpot, so you can automatically:
- Capture contacts 24/7
- Create and assign deals
- Sync key data fields
- Keep your pipeline full and clean
From chat to CRM in seconds. No manual work. No missed follow-ups.
Why Integrate with HubSpot?
MagicBlocks AI Agents work around the clock. But if you're still relying on spreadsheets or manual exports, you’re bottlenecking your sales.
With HubSpot CRM integration, you can:
- Auto-deliver qualified contacts from every session
- Instantly create deals in the right pipeline
- Map custom fields for full contact records
- Focus your human reps on closing, while AI handles the heavy lifting
Step-by-Step: Connect HubSpot to MagicBlocks
Choose when to transfer contact
Decide the moment when the Agent should send data to HubSpot:
- Session End — sends after every conversation
- Goal — sends only when a specific milestone is achieved
Most users choose Goal so only qualified contacts get pushed into HubSpot.
Select from Goal
Pick which Goal should trigger deal creation or contact transfer.
Examples include:
- Session Booked
- Contact Captured
- Follow Up Needed
- Hook Engaged
- Human Handover
- Action Pitched
- Contact Created
Selecting something like Follow Up Needed ensures only actionable contacts reach your CRM.
Min user messages
Set the minimum number of messages required before triggering a HubSpot transfer.
This prevents incomplete or empty handovers.
Active toggle
Turn HubSpot delivery on. If disabled, nothing will be sent even if the Goal is reached.
Connected HubSpot account
Choose which HubSpot account to send contacts to.
You must connect at least one account beforehand.
Deal settings
HubSpot handover lets you automatically create a deal for every qualified contact.
You’ll configure:
- Deal name — can be dynamic using user data
Example:New Contact – {{user.name}} - Pipeline — select the HubSpot sales pipeline
- Deal stage — choose the exact stage where the contact should land
This ensures your deals drop into the right workflow instantly.
Fields mapping
Match MagicBlocks contact fields with HubSpot CRM fields.
Example:
- Phone → Phone
- Email → Email
You can map additional fields (e.g., company, service, budget) to match your HubSpot setup.
You can add more fields and map them to custom Hubspot fields as needed. You can choose from the following built-in data fields:
- Agent ID
- Channel
- City
- Contact ID
- Country
- Email Address
- First Name
- Middle Name
- Last Name
- Phone
- Is Test
- Inquiry Message
- Last Message
- Session ID
- Summary
- Transcript
New:
- Flexible Transcript Mapping: User can now hand over conversation transcripts by mapping the MagicBlocks “Transcript” field directly to Contacts in HubSpot
- Automatic Note Creation: Any MagicBlocks field mapped to “Note” will now generate individual notes in HubSpot during contact transfer.
On the right side, the payload preview shows a sample of what HubSpot will receive.
Flow: How to Set Up HubSpot Handover
1. Open Contact Transfer
Inside your Agent, open the Contact Transfer settings and create or edit a HubSpot rule.
2. Select “Goal”
This ensures only meaningful contact events trigger HubSpot syncing.
3. Pick the Goal
Choose the milestone that qualifies a contact (e.g., Contact Captured, Follow Up Needed).
4. Set minimum user messages
Add protection to avoid empty submissions.
5. Switch to the HubSpot tab
Enable the Active toggle for HubSpot.
6. Choose your connected HubSpot account
Select one of your linked CRM accounts.
7. Configure the deal settings
Set:
- Deal name (dynamic if desired)
- Pipeline
- Deal stage
This determines where the contact lands in your HubSpot pipeline.
8. Map your fields
Match your MagicBlocks contact fields to HubSpot fields.
9. Review payload preview
Confirm the data appears correctly for HubSpot.
10. Save
Activate your rule.
11. Test
Trigger the selected Goal in a test chat and check HubSpot to ensure the deal and contact are created correctly.
What This Unlocks
Once configured, your AI Agent will automatically:
- create HubSpot deals for qualified contacts
- send mapped contact fields
- place contacts in the correct pipeline and stage
- power your HubSpot automations instantly
- ensure fast follow-ups with zero manual effort
It turns your AI Agent into a real-time CRM feeder for your sales team.
This video will explain the step-by-step process on how to integrate Hubspot to your MagicBlocks AI Agent:
How to Get Your HubSpot Access Token
To connect your HubSpot CRM, you need to create a Private App with the right access scopes.
Follow These Steps:
Log into your HubSpot account: app.hubspot.com
Go to Settings (top right corner)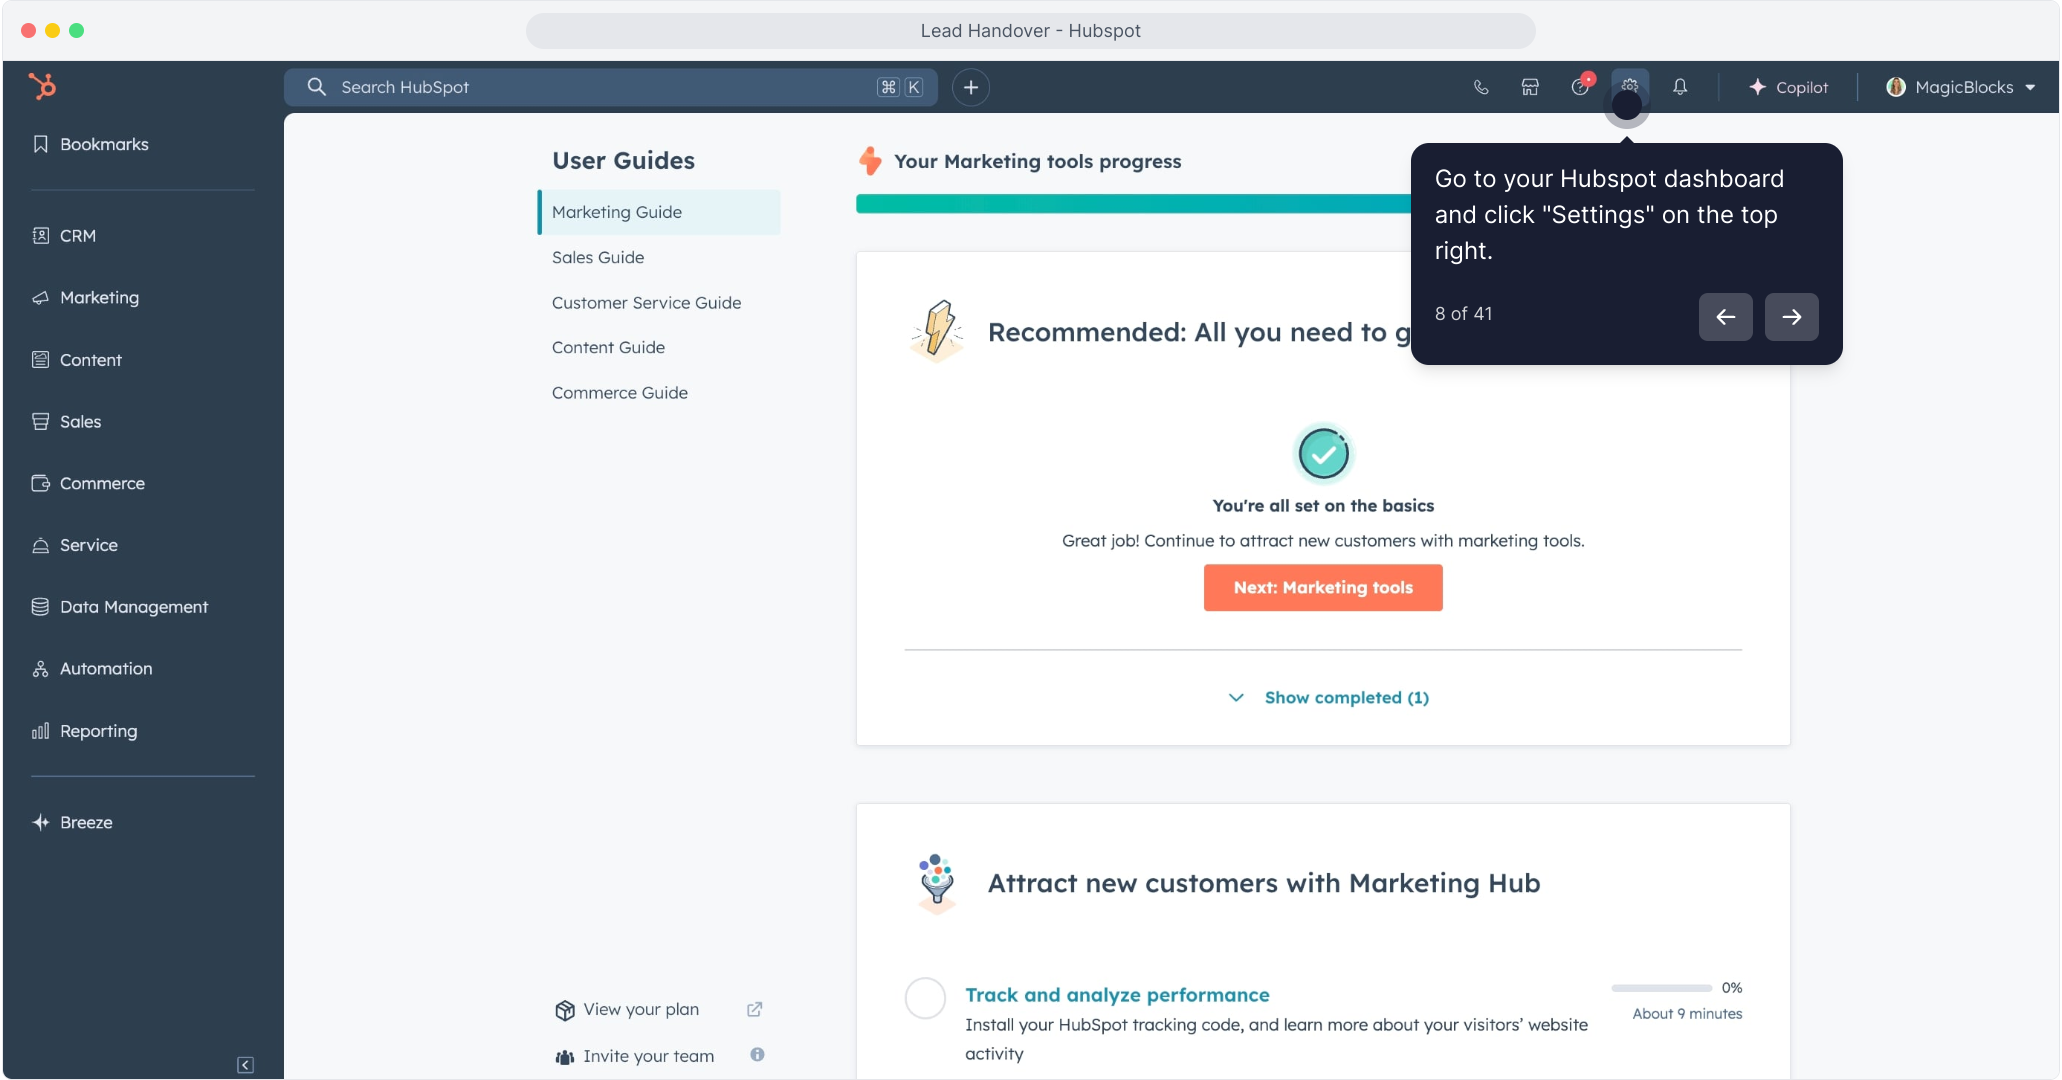
Navigate to:
Integrations > Private Apps
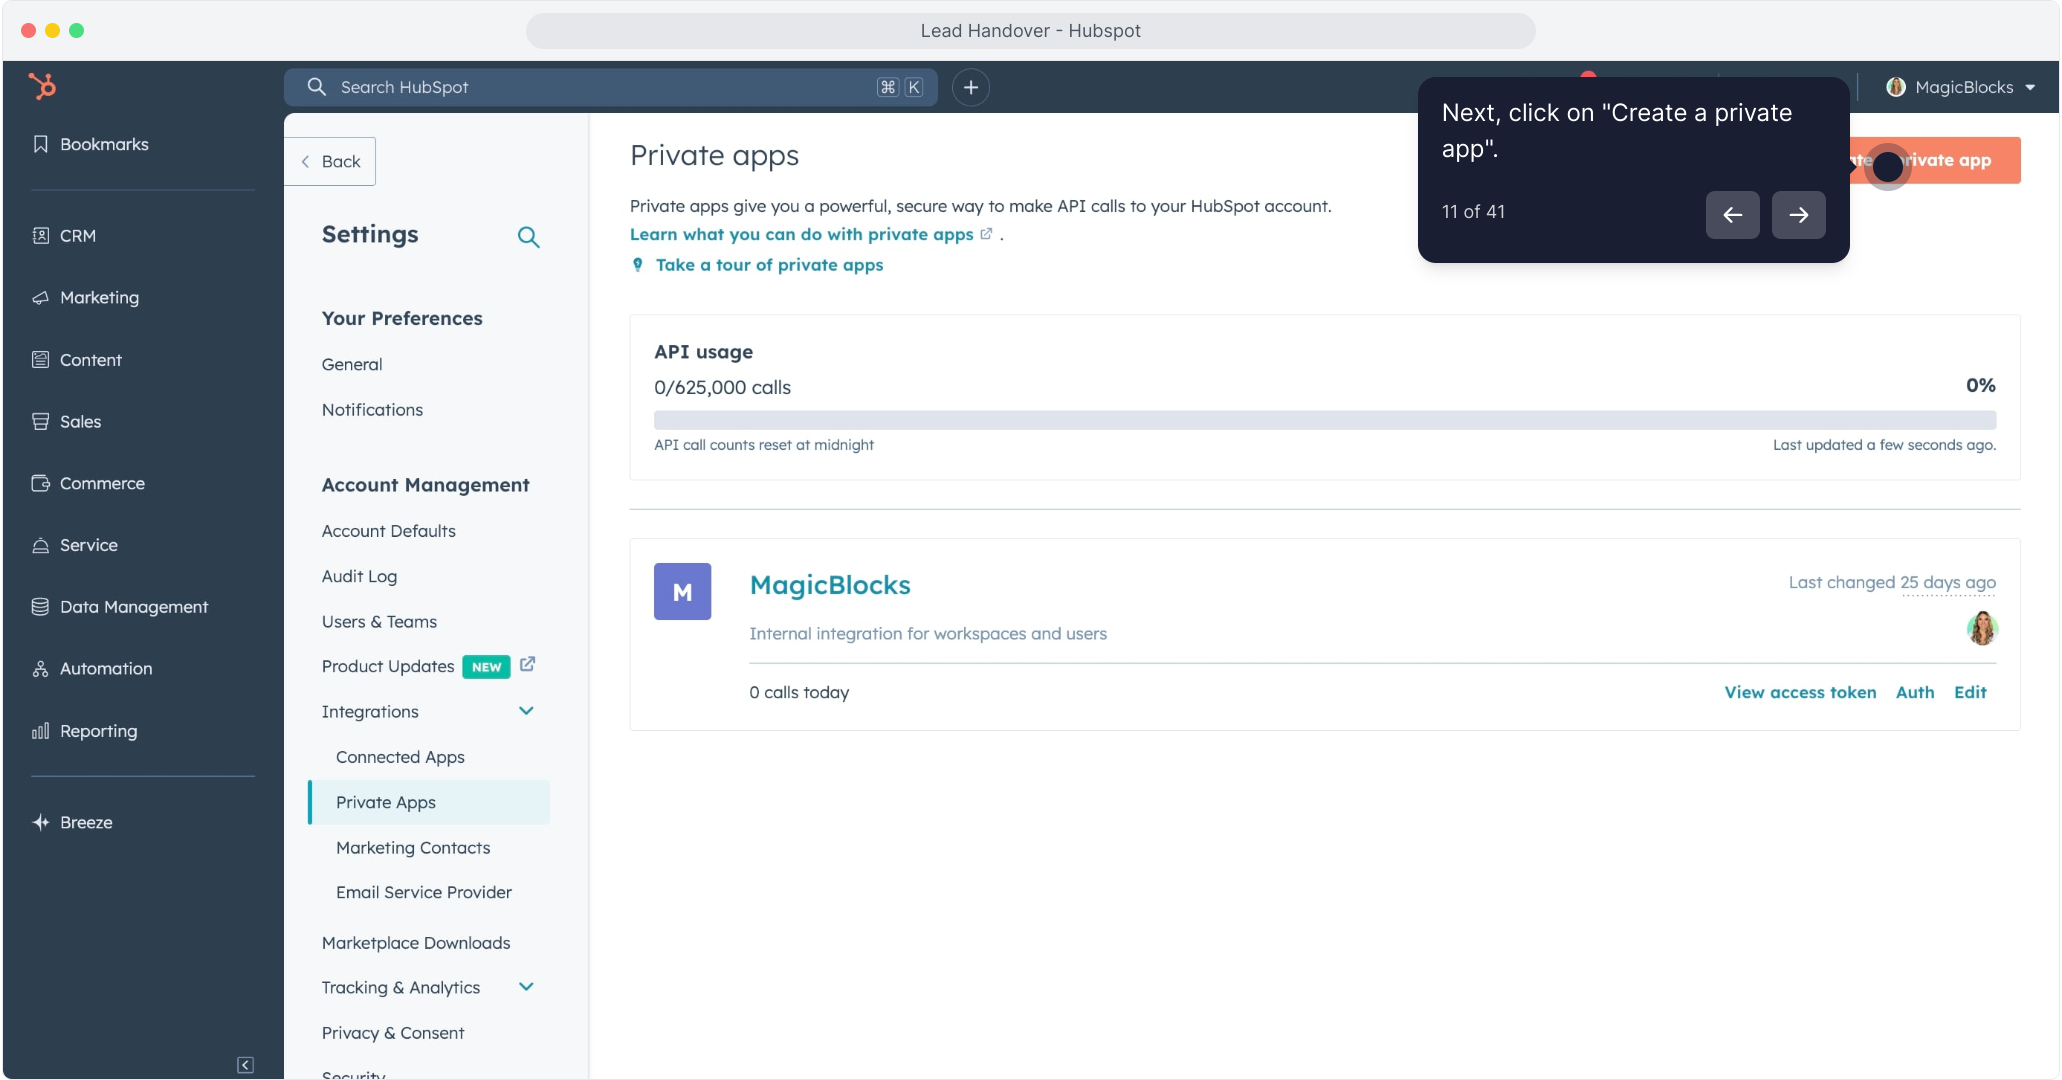
Click “Create a Private App”
Name your app (e.g. “MagicBlocks Sync”)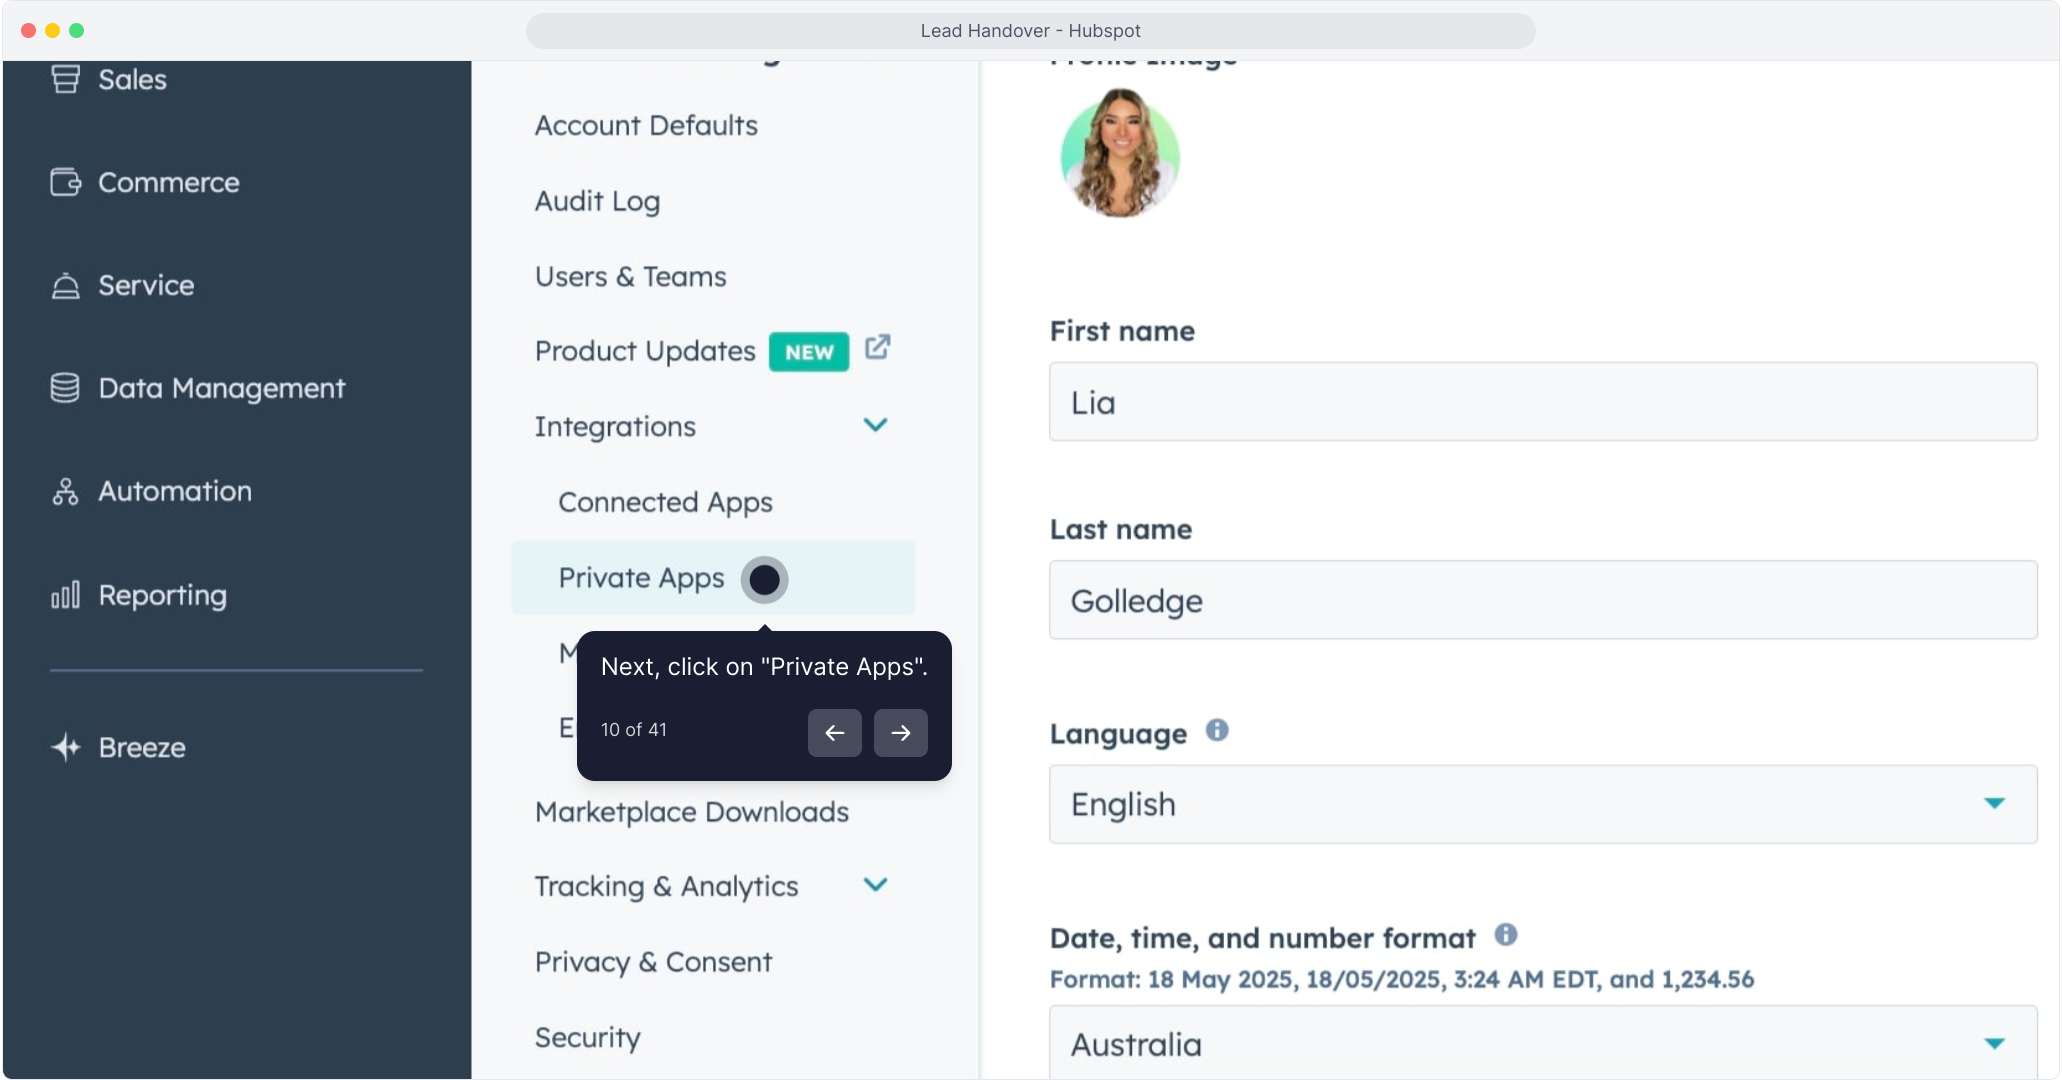
Add These Scopes:
crm.objects.contacts.read – Read contact data
crm.objects.contacts.write – Create or update contacts
crm.objects.deals.read – Read deal data
crm.objects.deals.write – Create or update deals
crm.objects.companies.read – Read company data
crm.objects.companies.write – Create or update companies
crm.objects.line_items.read – (Optional) Read associated product/line item details
e-commerce – (Optional) Required if you're using HubSpot's e-commerce features
Pro Tip: Only include the scopes you actually need. This keeps your integration secure and streamlined.
Click Create App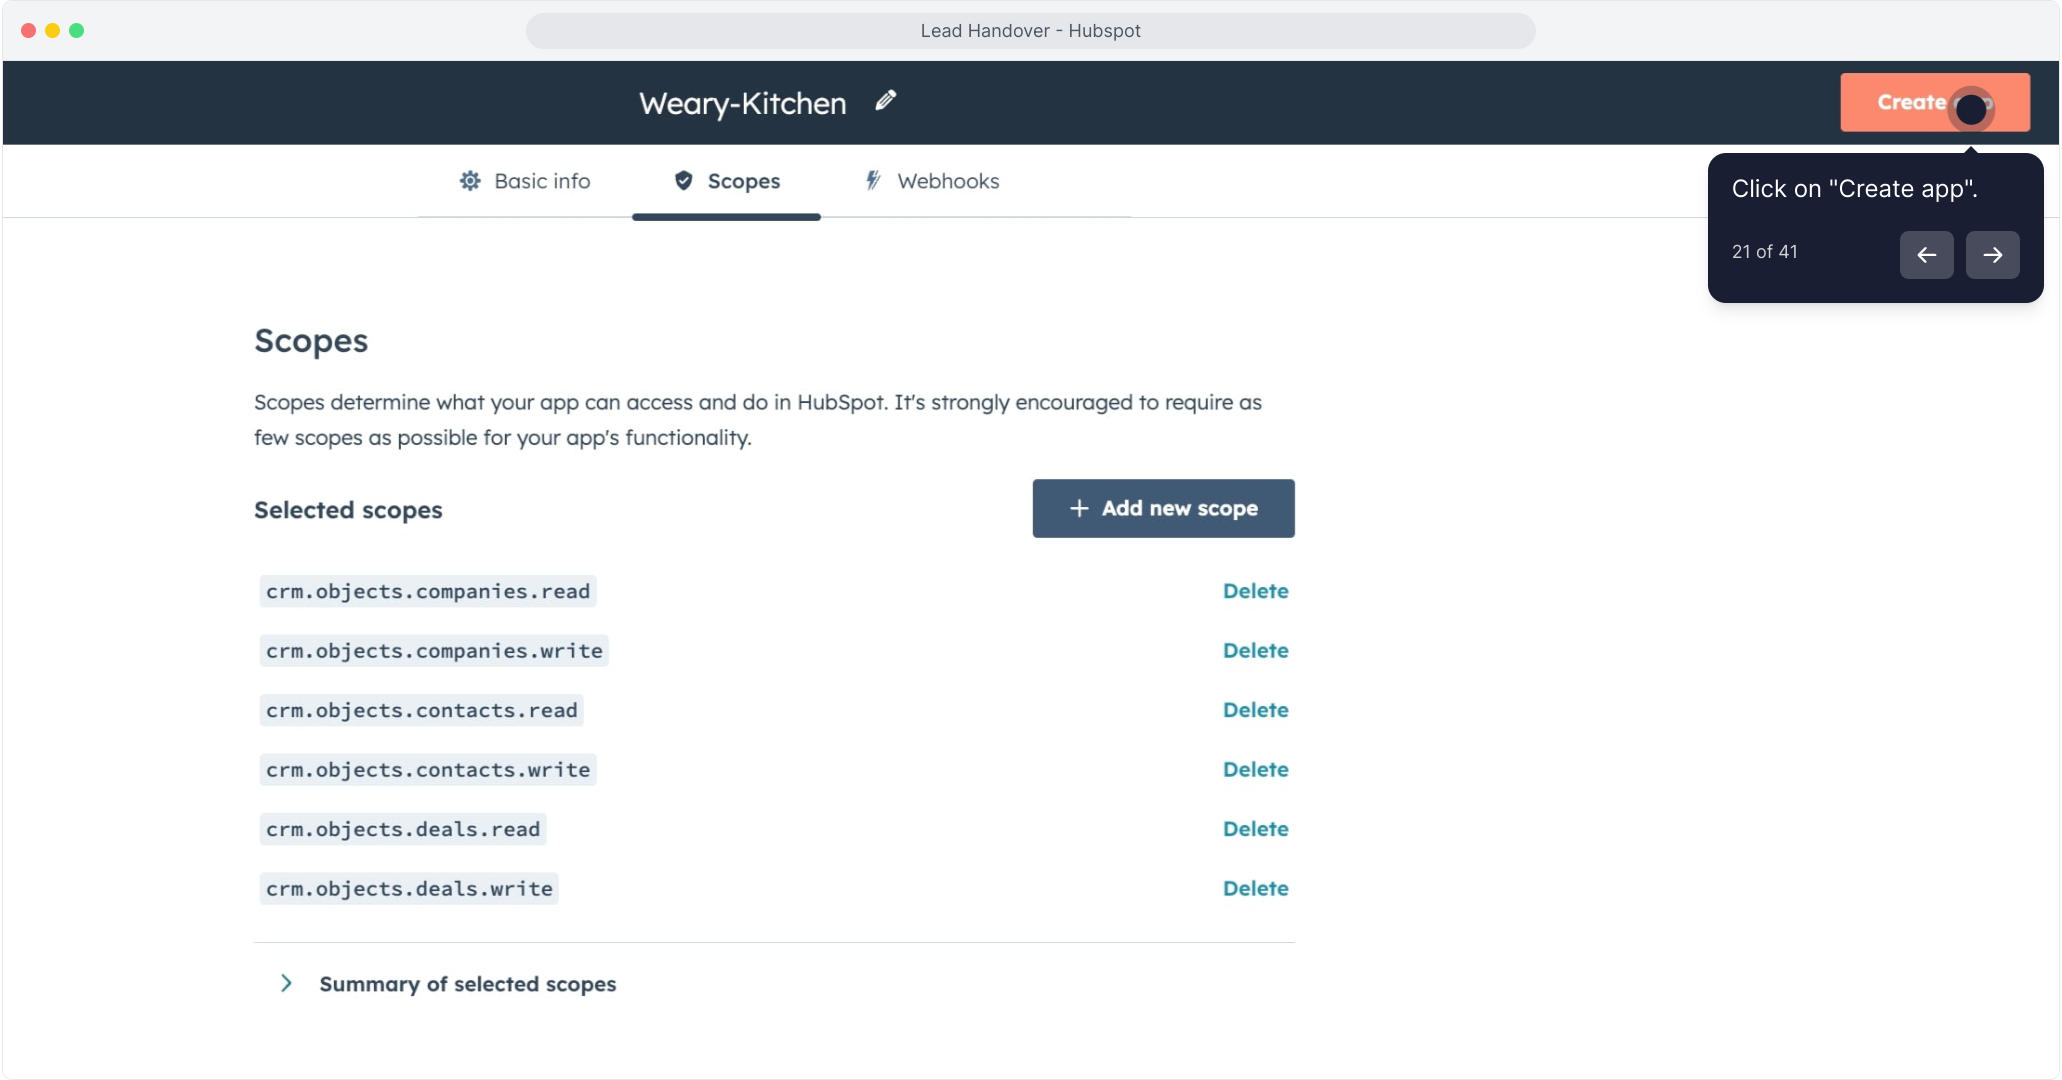
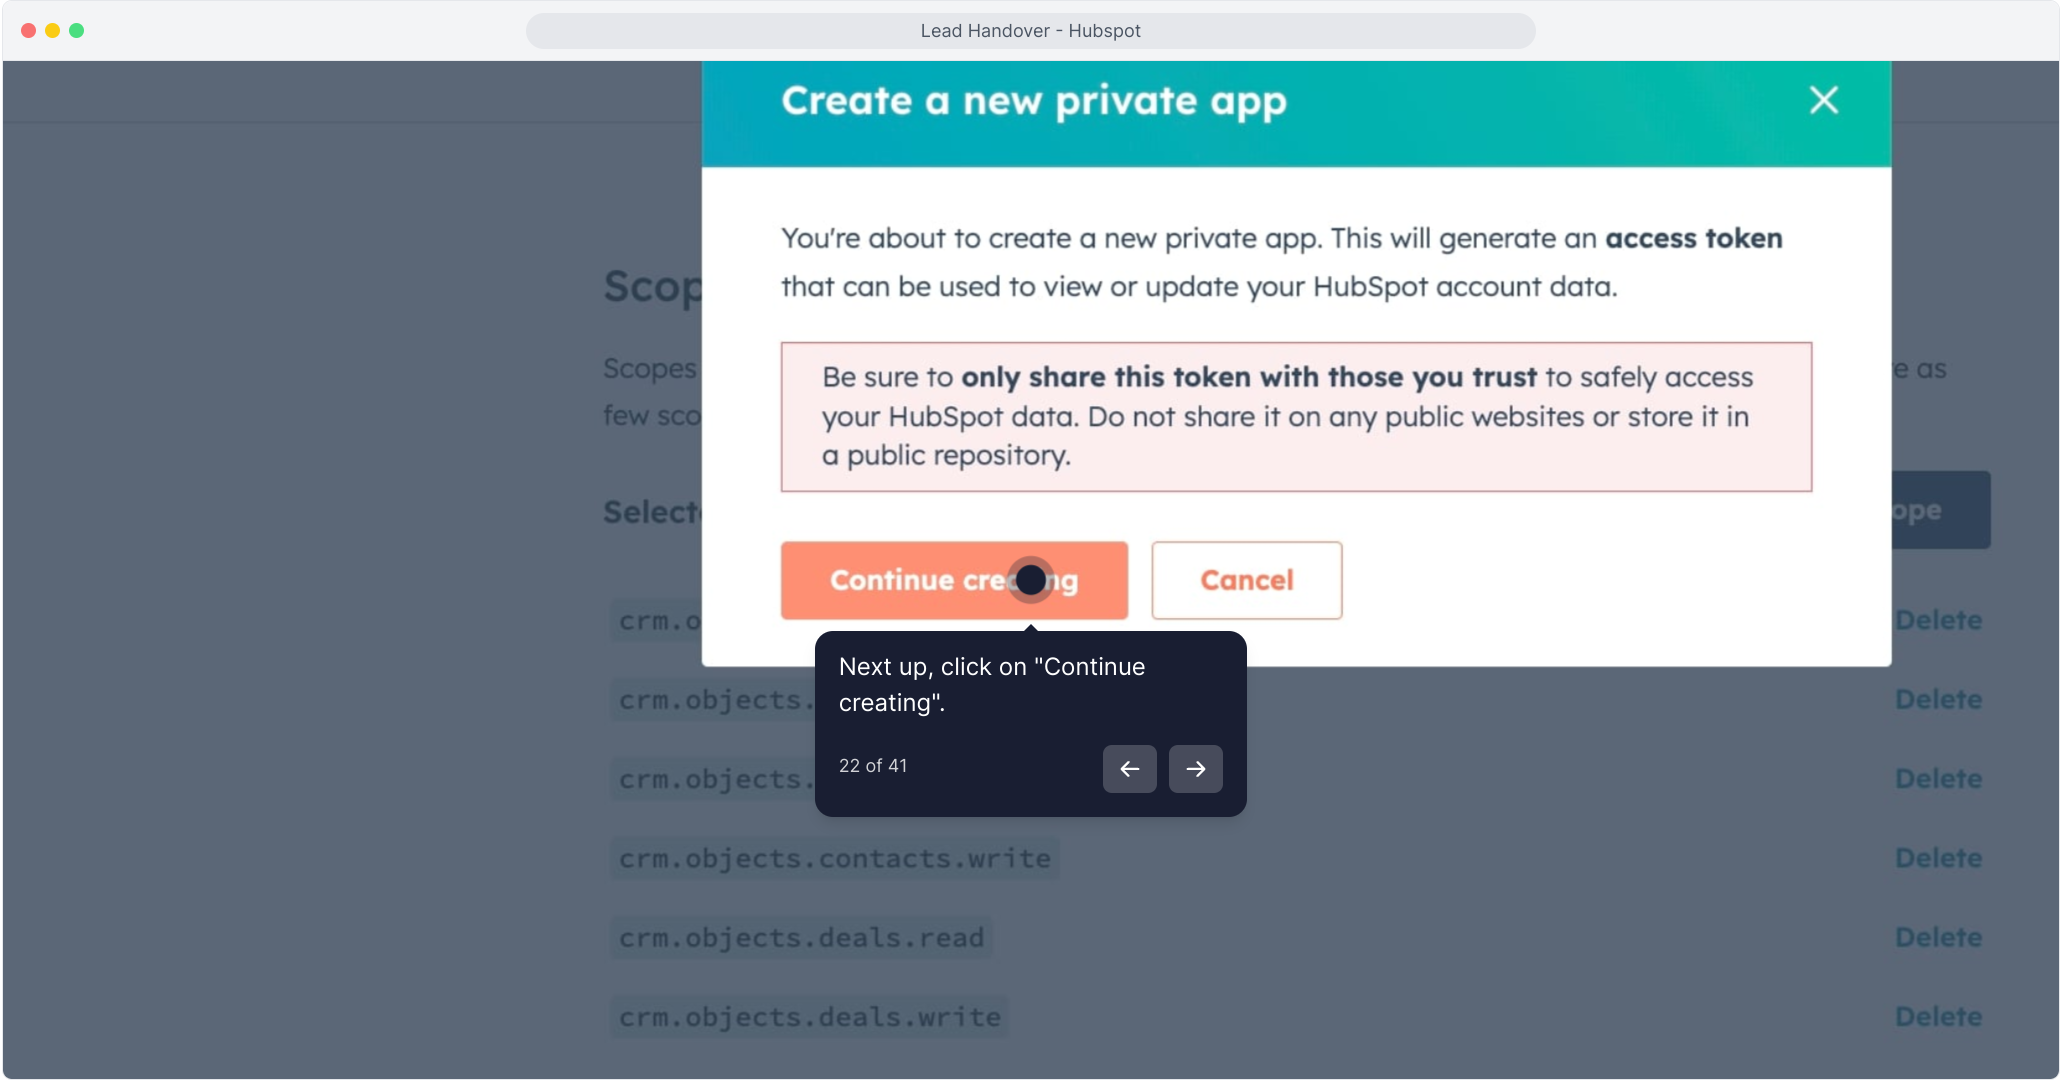
Copy the Access Token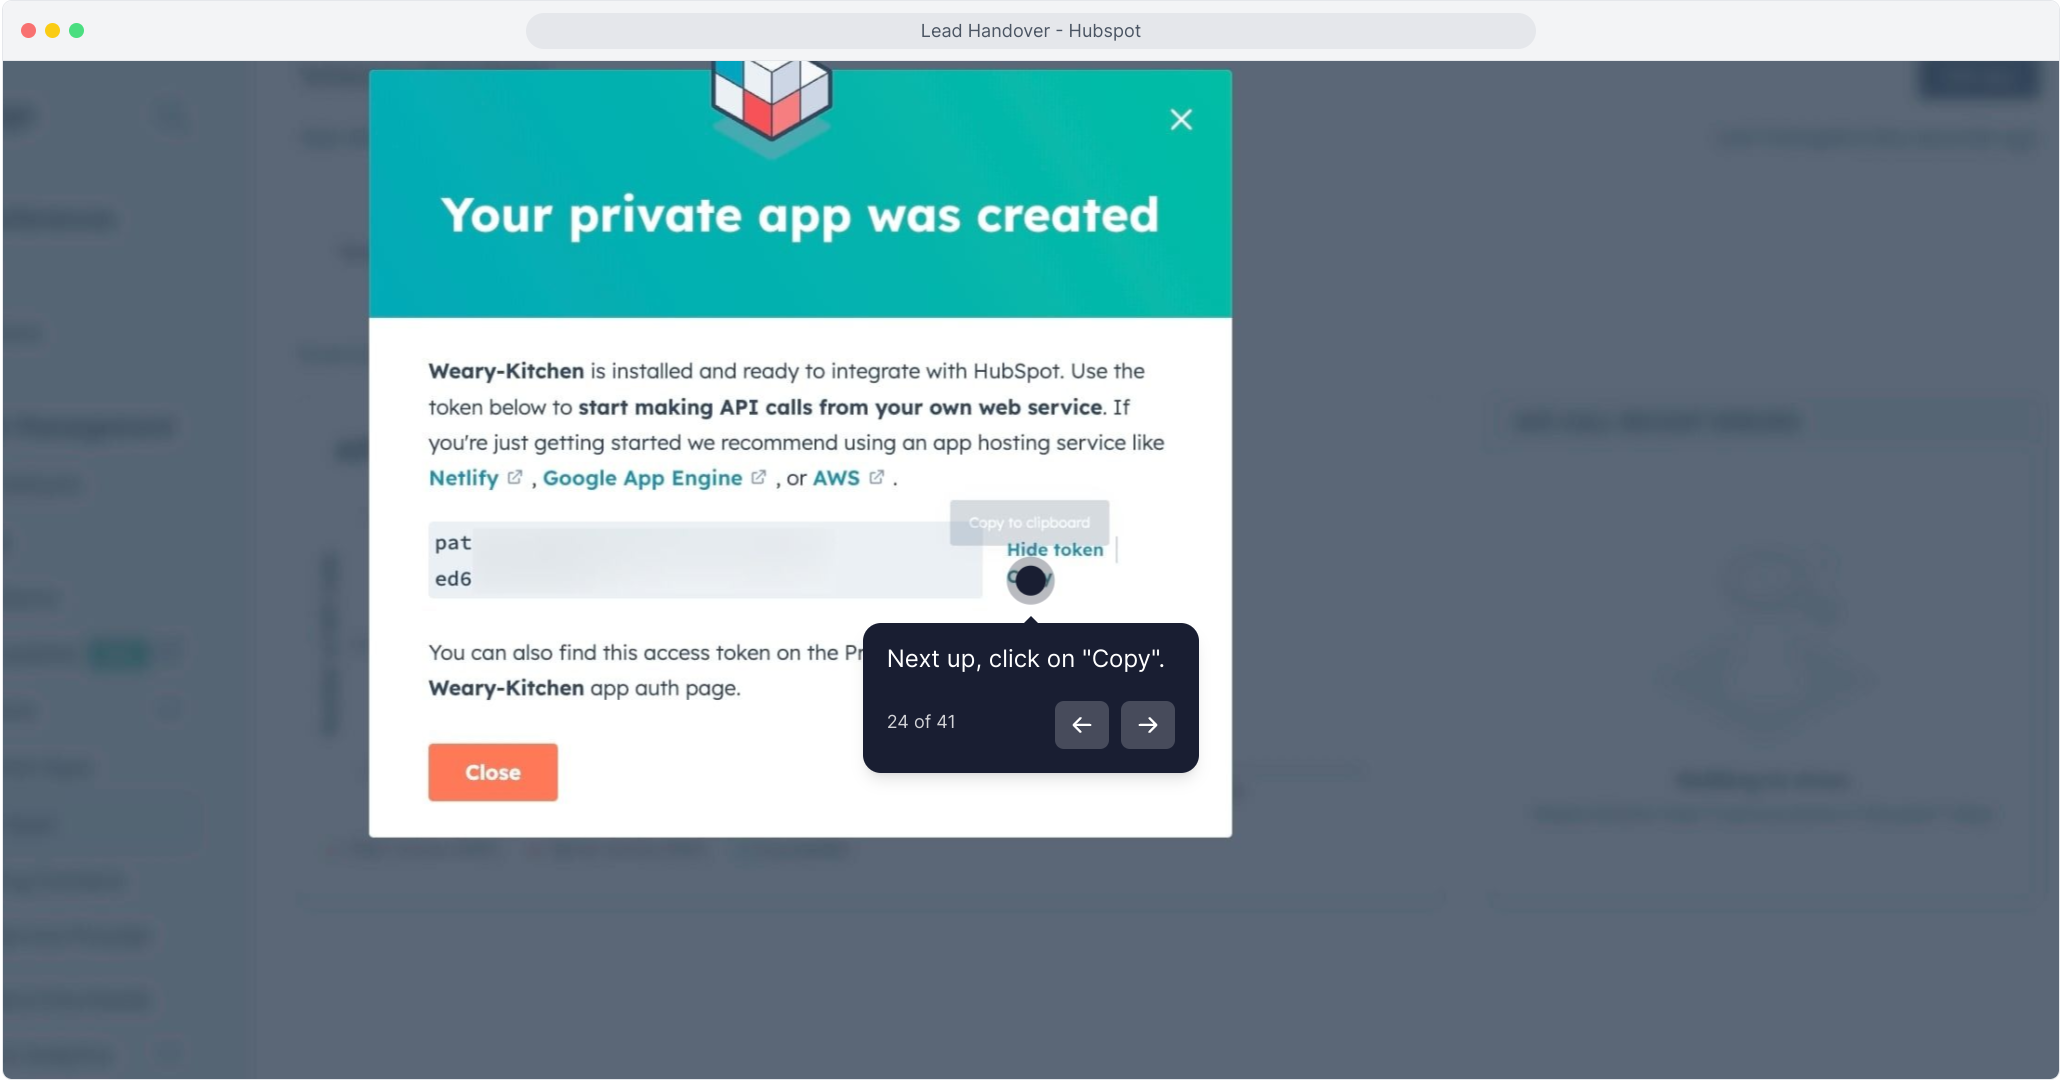
Paste it into MagicBlocks under Access Token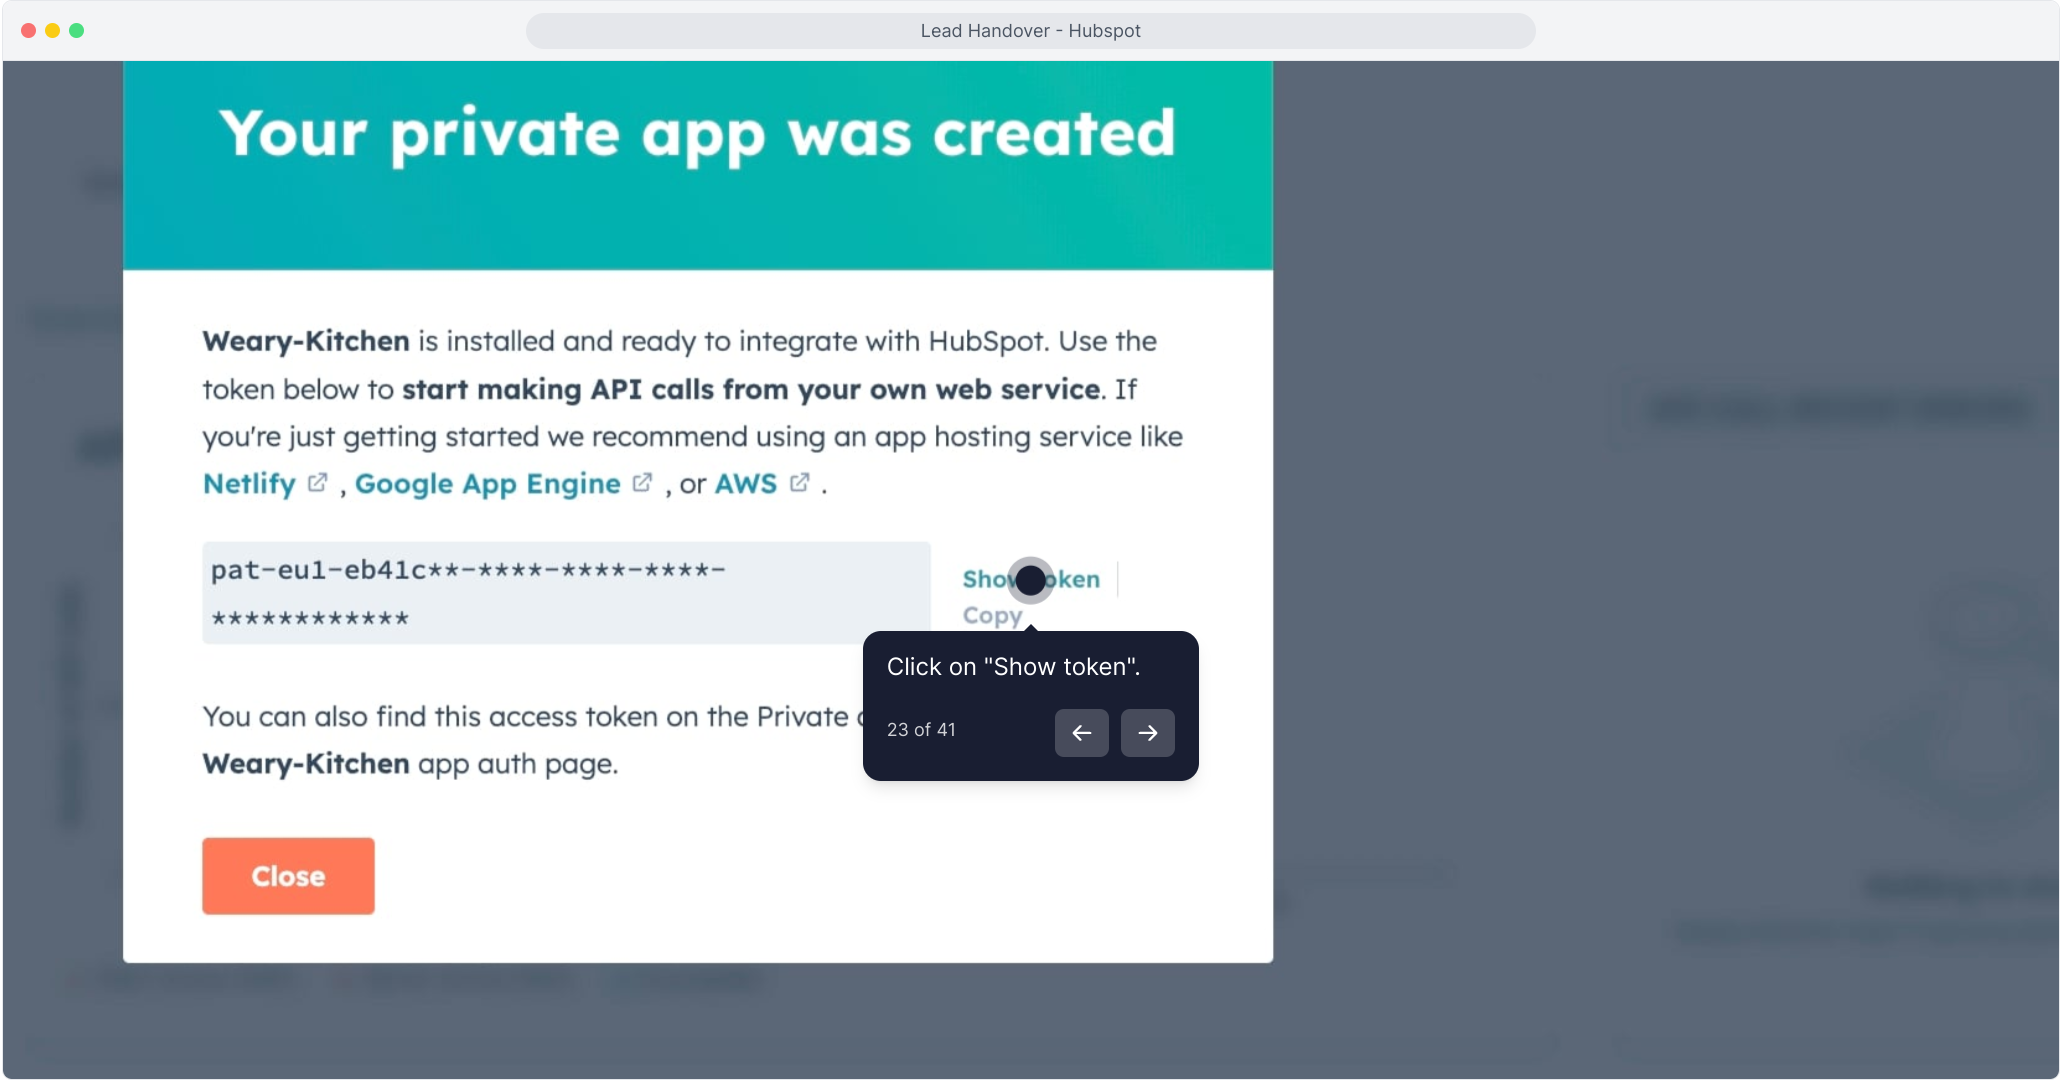
Hit Connect
Your HubSpot Account is Now Connected!
From the dropdown, select your connected account. You’re now ready to automate deal creation.
Enable Auto Deal Creation (Optional but Powerful)
Toggle “Enable deal creation” to automatically create deals in HubSpot when a contact is captured.
Fill out:
- Deal name – e.g. {{user_email}} MagicBlocks Contact
- Pipeline – Choose the pipeline in your HubSpot CRM
- Deal stage – Pick where you want new deals to land (e.g. “New Contact”)
Map Your Fields
Match MagicBlocks Contact Fields to HubSpot Fields for accurate data transfer.
Example mapping:
Phone → Phone
Email → Email
Click + Add fields to include custom fields like Name, Company, Zip Code, etc.
Test Your Connection
Once your fields are mapped, click Test Post to simulate sending a contact.
On the right, check the Payload section to confirm correct formatting and values:
✅ Phone → 8174489760
✅ Email → [email protected]
This video will explain the step-by-step process on how to integrate HighLevel to your MagicBlocks AI Agent:
You’re All Set!
Your MagicBlocks AI Agent is now fully connected to HubSpot CRM.
From now on, qualified contacts will flow directly into your CRM with mapped fields, assigned deals, and zero manual work.