
Client Review
Before launching your AI Agent live, it’s essential to share access with clients or stakeholders so they can review, test, and approve the experience.
MagicBlocks allows you to easily invite clients into your workspace with different permission levels or share a preview link for demo and feedback.
1. Invite Clients as Members
You can invite clients or collaborators directly into your workspace to review the Agent’s setup.
Steps:
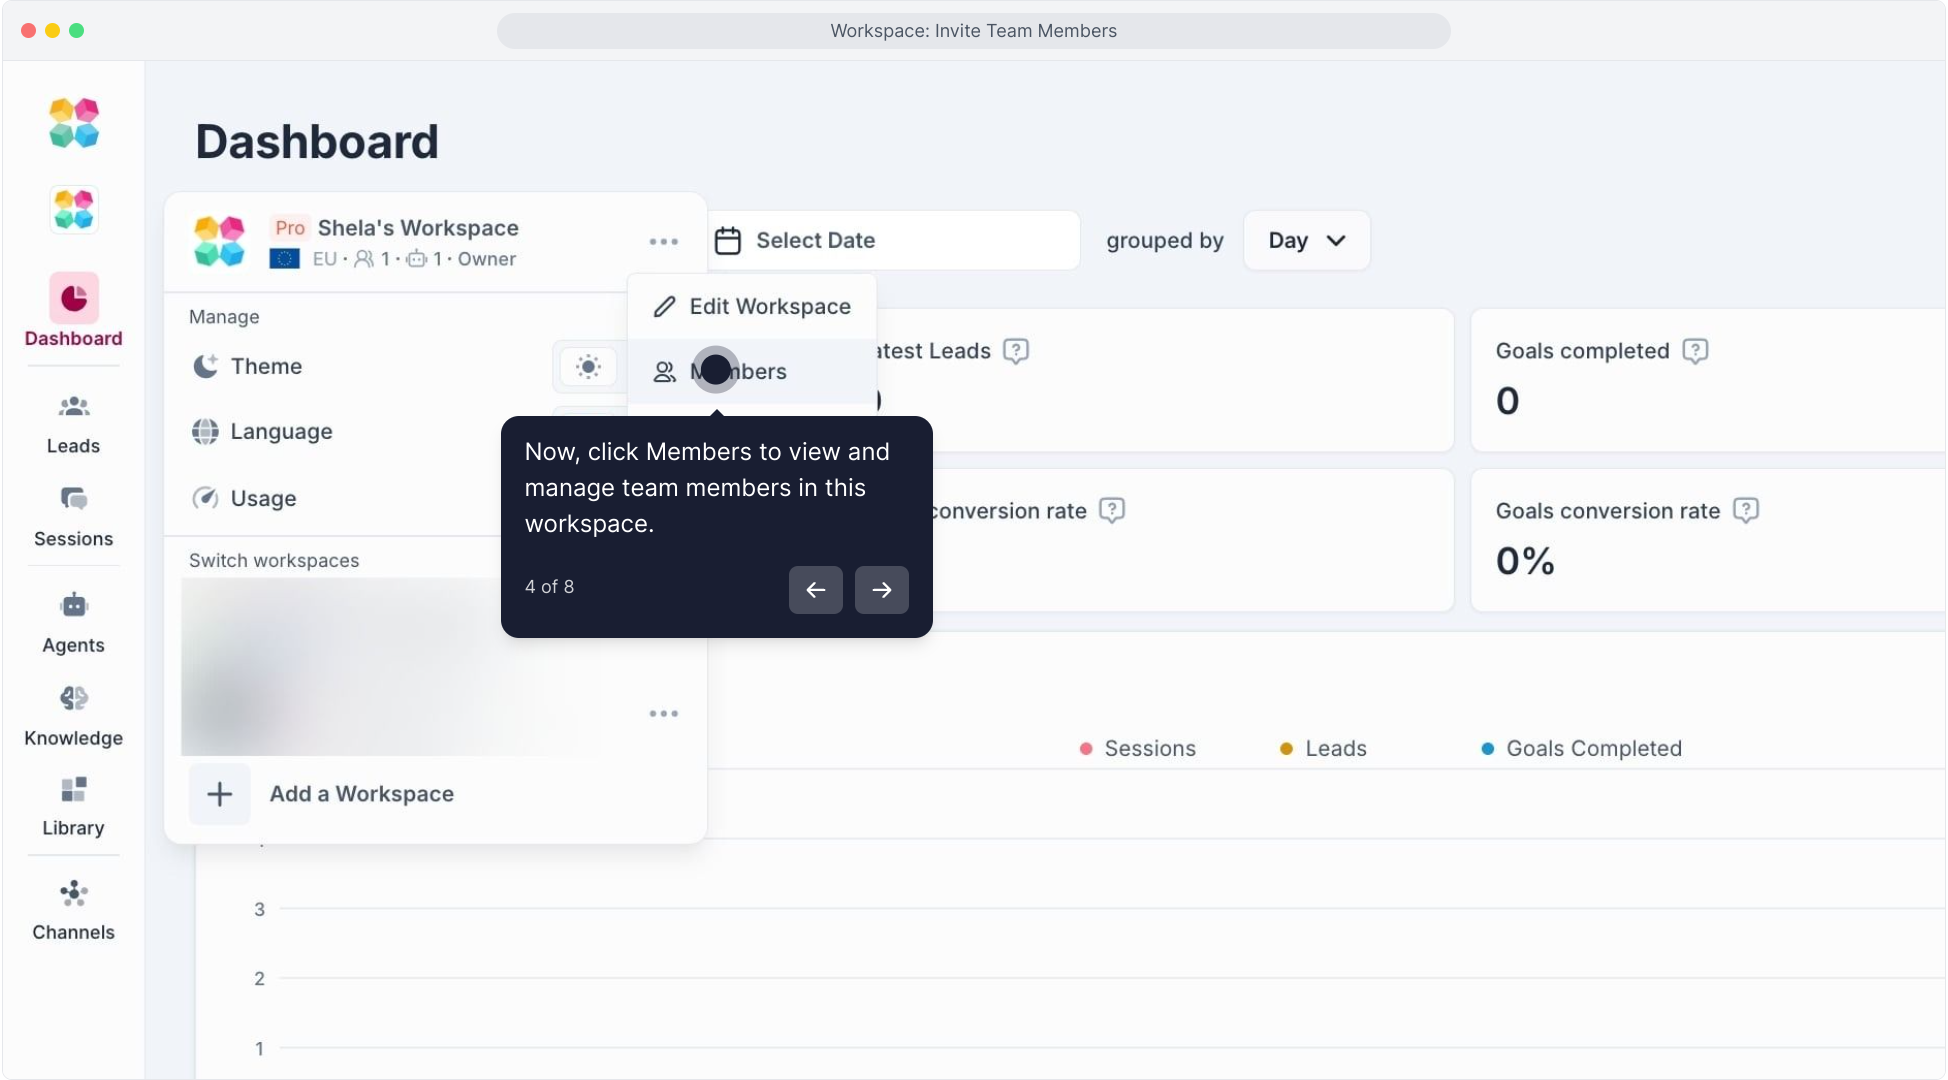
- Go to Dashboard → Workspace → Members
(See screenshot below) - Click Invite Member and enter the client’s email address.
- Choose an appropriate role:
- Viewer → View-only access to all features and content (best for client review).
- Editor → Can make edits and test flows.
- Admin/Owner → Full access (use only for internal teams).
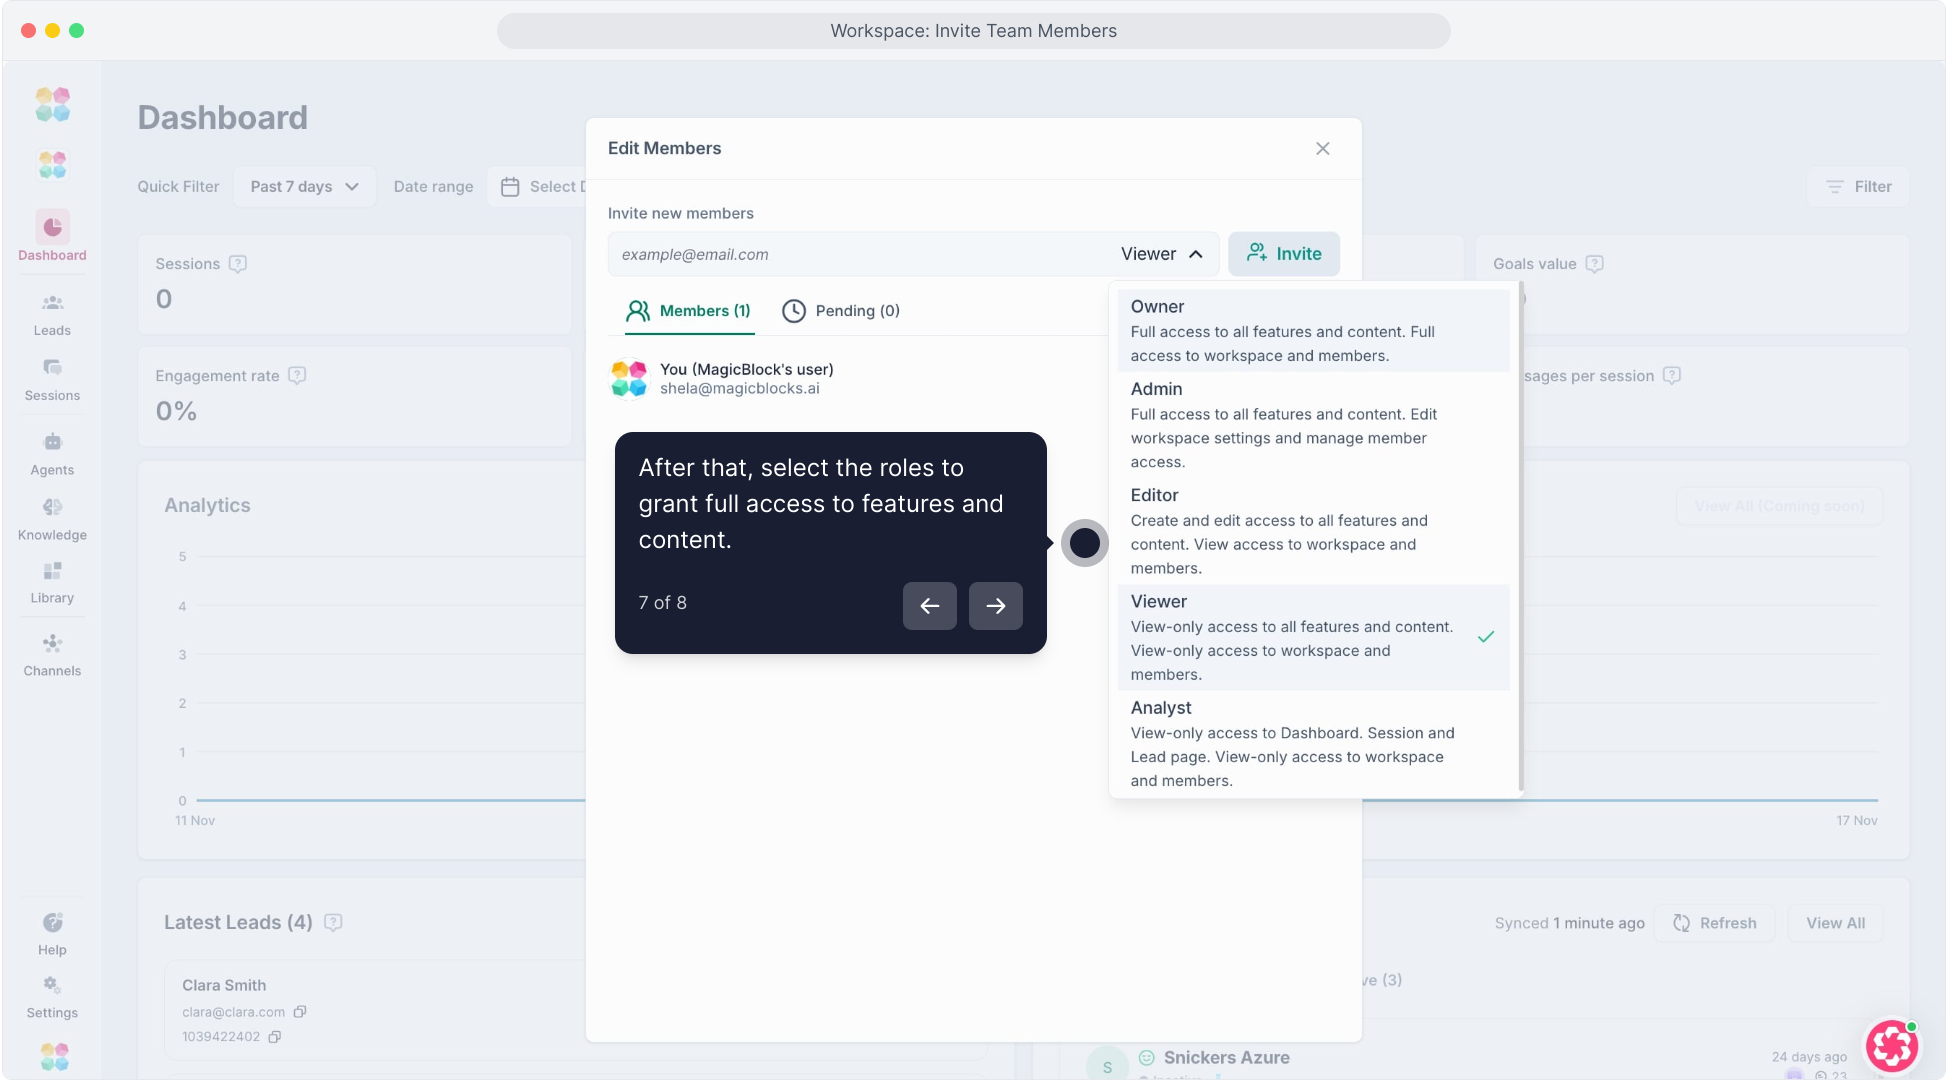
- Click Invite.
Tip: Use “Viewer” role when sharing access with external clients to prevent accidental changes.
2. Share AI Agent for Review & Approval
Once your Agent is ready for review, share a live demo link for client testing.
Steps:
- Go to your Agent → Try My Agent.
- Click Share in the top-right corner.
Copy the shareable link or use the Test Chat mode to simulate live interaction.
Send the link to your client for them to review and leave feedback.
They’ll be able to:
- Chat with your AI Agent.
- Experience the full conversation flow.
- Provide feedback before going live.
3. Review & Approve Agent Before Go-Live
Before publishing, send testing QA list and schedule a short approval session with your client to walk through:
Final Launch Checklist
Before going live, make sure everything is aligned and ready:
1. Agent Setup
- Persona tone and identity match the client’s brand.
- All Key Facts are accurate and verified.
- Knowledge Base contains the latest approved content.
2. Conversation Flow
- Each Journey block transitions smoothly (no dead ends).
- Qualification and Pitch blocks collect and route contacts correctly.
- Conditional Actions and Key Facts are functioning as expected.
3. Actions & Integrations
- CRM or webhook integrations tested and confirmed working.
- Contact transfer and notifications trigger properly.
- Booking or calendar links are live and synced.
4. Client Review
- Client has tested the Agent via shared link or workspace access.
- Feedback implemented and approved.
- Approval documented (email, chat, or client dashboard).
5. Technical QA
- Embed script added to the client’s site or channel.
- Tested on desktop and mobile.
- Final “Try My Agent” test passed.
Once all items are checked off — you’re ready to click Publish and take your AI Agent live!
Related Articles
Test Your AI Agent
Go Live: Publish Your Agent
Understanding Journey Blocks
Setting Smart Automation with Actions
Managing Workspace Members