Calendars
The Calendars integration in MagicBlocks lets your AI Agent schedule, confirm, and manage meetings directly inside the chat — no human handoff required.
Once connected, your Agent can read availability, book time slots, and send confirmations through Calendly, HubSpot Meetings, HighLevel, or Gmail Calendar.
It turns conversations into instant appointments — helping you capture contacts at their highest intent moments.
Why It Matters
Every great chat should lead to a next step.
The Calendar integration makes that step seamless — allowing users to schedule demos, consultations, or calls without leaving the conversation.
Your AI Agent can:
- Show available time slots in real time
- Book appointments on behalf of your team
- Send reminders or follow-up confirmations
- Sync bookings automatically to your preferred calendar tool
- No back-and-forth emails. No manual scheduling. Just frictionless conversions.
What You Can Connect
Platform | Description |
|---|---|
Calendly | The easiest way to share your booking link or embed availability in chat. |
HubSpot Meetings | Integrate HubSpot’s built-in calendar for CRM-linked meetings. |
HighLevel (GoHighLevel) | Use your HighLevel pipeline and calendar integration for appointment workflows. |
Gmail Calendar | Connect your Google account to sync appointments directly to Google Calendar. |
Each integration works the same way — the difference is where your bookings are stored and how they trigger follow-up workflows.
How It Works
Connection Setup
Connect your calendar app from Library → Connections → Calendar (see specific tutorials below).
Once connected, MagicBlocks automatically detects your available calendars and booking links.
Enable in Journey Block
Add a Calendar Action inside your Journey (e.g., “Book a Call” or “Schedule a Demo”).
You can display a booking link
Or use dynamic scheduling (Agent suggests slots automatically)
Auto-Sync Events
When a user selects a time, MagicBlocks pushes the event directly to your chosen calendar (Calendly, HubSpot, HighLevel, or Gmail).
The meeting is created instantly — complete with user details and timestamps.
Confirm via Chat or Email
The Agent sends a confirmation message and can optionally send an email or SMS reminder through your existing integrations.
Example Conversation Flow
User: “I’d love to schedule a call.”
Agent: “Sure! Here are my next available times 👇”
(Agent shows 3 available slots)
User: “Let’s do tomorrow at 2 PM.”
Agent: “Perfect — I’ve booked you in for tomorrow at 2 PM. You’ll get a confirmation email shortly.”
This entire flow can run automatically once your calendar is connected — no extra setup required.
Supported Actions
Action Type | What It Does | Example |
|---|---|---|
Show Booking Link | Displays your connected booking link. | “You can pick a time here: {{calendly_link}}.” |
Auto Schedule | Agent checks your calendar and proposes available times. | “I have openings tomorrow at 2 or 4 PM — which works for you?” |
Record Appointment | Saves user’s chosen time to your CRM via Webhook or Contact Transfer. | Syncs appointment info to HubSpot or HighLevel. |
Send Confirmation | Sends a confirmation message or follow-up email/SMS. | “All set! See you tomorrow 🚀.” |
Connection Tutorials
For detailed setup steps, follow the respective tutorial in the Library > Connections section:
Each guide walks you through authentication, selecting the right calendar, and testing your first booking flow.
Tips & Best Practices
✅ Keep booking names clear — e.g. “AI Demo Call” instead of “Meeting.”
✅ Include buffer times between meetings inside your scheduling tool.
✅ Use Dynamic Tokens like {{name}}, {{email}}, or {{date_selected}} in confirmation messages.
✅ Pair with Email or SMS Actions for post-booking reminders.
✅ Use the Contact Transfer feature to sync new appointments to your CRM.
Common Issues
Issue | Cause | Fix |
|---|---|---|
Calendar not showing slots | Integration not authenticated | Reconnect via Library → Connections |
Wrong timezone | User or Agent timezone mismatch | Set timezone in Connection settings |
Duplicate bookings | Multiple Agents using same link | Assign unique links per Agent |
Booking not logged in CRM | Contact Transfer not configured | Add CRM webhook or sync in Actions |
Why It’s Powerful
Your AI Agent can now do more than answer questions — it can book business.
By integrating calendars, MagicBlocks lets you:
- Capture contacts while intent is high
- Reduce no-shows through reminders
- Automate scheduling and follow-up
- Keep your sales team calendar full — automatically
- The result: a 24/7 AI that not only chats, but also converts.
Calendly
Scheduling meetings manually can be inefficient, leading to missed opportunities and wasted time. MagicBlocks AI Agent enables automated appointment booking, ensuring instant engagement and frictionless scheduling. This tutorial will guide you through the exact steps to integrate a scheduling system into your AI Agent using Calendly as an example.
Why Automate Calendar Appointments?
✅ Speed to Lead – Respond to contact within seconds, increasing conversion rates.
✅ Seamless User Experience – Allow contacts to book instantly without back-and-forth emails.
✅ No Manual Scheduling – AI takes care of appointment setting, freeing up sales teams for high-value interactions.
MagicBlocks supports:
- Calendly
- Google Appointment Schedule
- HighLevel Calendar
- HubSpot Calendar
Strategic Setup: Where This Fits in Your Blocks
When designing your AI Agent, calendar scheduling should not be offered too early. Instead, you want the AI to:
- Qualify the contact → Do they meet your basic criteria (e.g., budget, role, intent)?
- Build interest and deliver value → This can happen in the Pitch block.
- Offer a call at the right moment → When key facts are collected or intent is confirmed.
📍 Recommended Block Setup:
Block Name: "Schedule Meeting" or "Book a Call" or included in “Personalize, Pitch, Action” Block.
Trigger Points:
- A user types “book a call,” “talk to someone,” or “schedule a meeting.”
- All key facts are collected (e.g., contact shows intent + fits target persona).
- It’s the final call-to-action after a successful pitch.
This ensures the AI Agent feels smart and intentional, not pushy or robotic.
Step-by-Step Guide to Setting Up Calendar Appointment Automation
Step 1: Access Your Blocks
Log in to MagicBlocks and select your AI Agent through Agents.
Click on one of your Journey Blocks (e.g., “Meeting” or “Appointment Scheduling”).
This allows you to modify how the AI Agent responds when users request a meeting.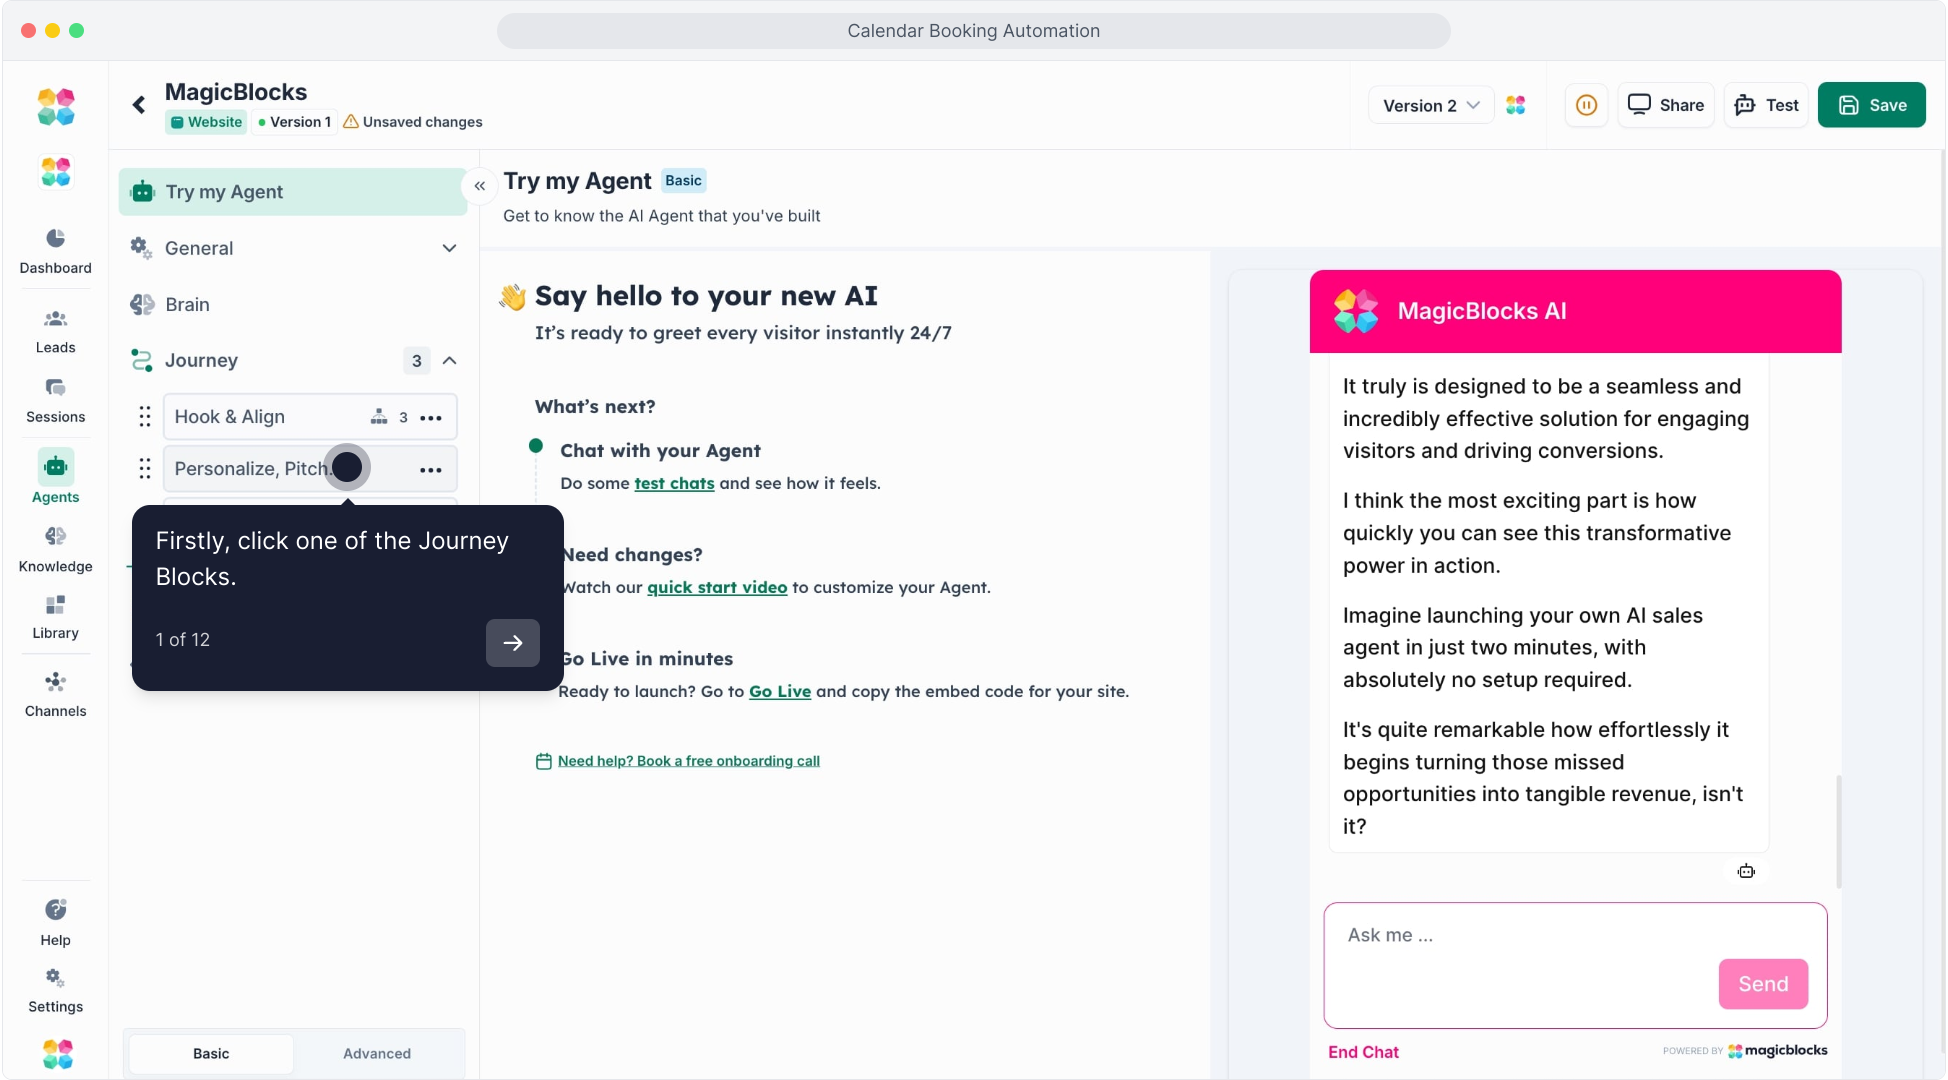
Step 2: Navigate to the Actions Section in the Block
Click on “Actions” in the selected Block.
Actions control when and how your AI schedules an appointment.

Step 3: Set Up Scheduling Conditions
Define when your AI should trigger the booking action, such as:
- A user message contains “meeting,” or “talk to sales.”
- Specific Call-to-Action (CTA) in the Pitch block.
- All key facts are found and the contact meets qualification criteria (e.g., company size, budget, intent).
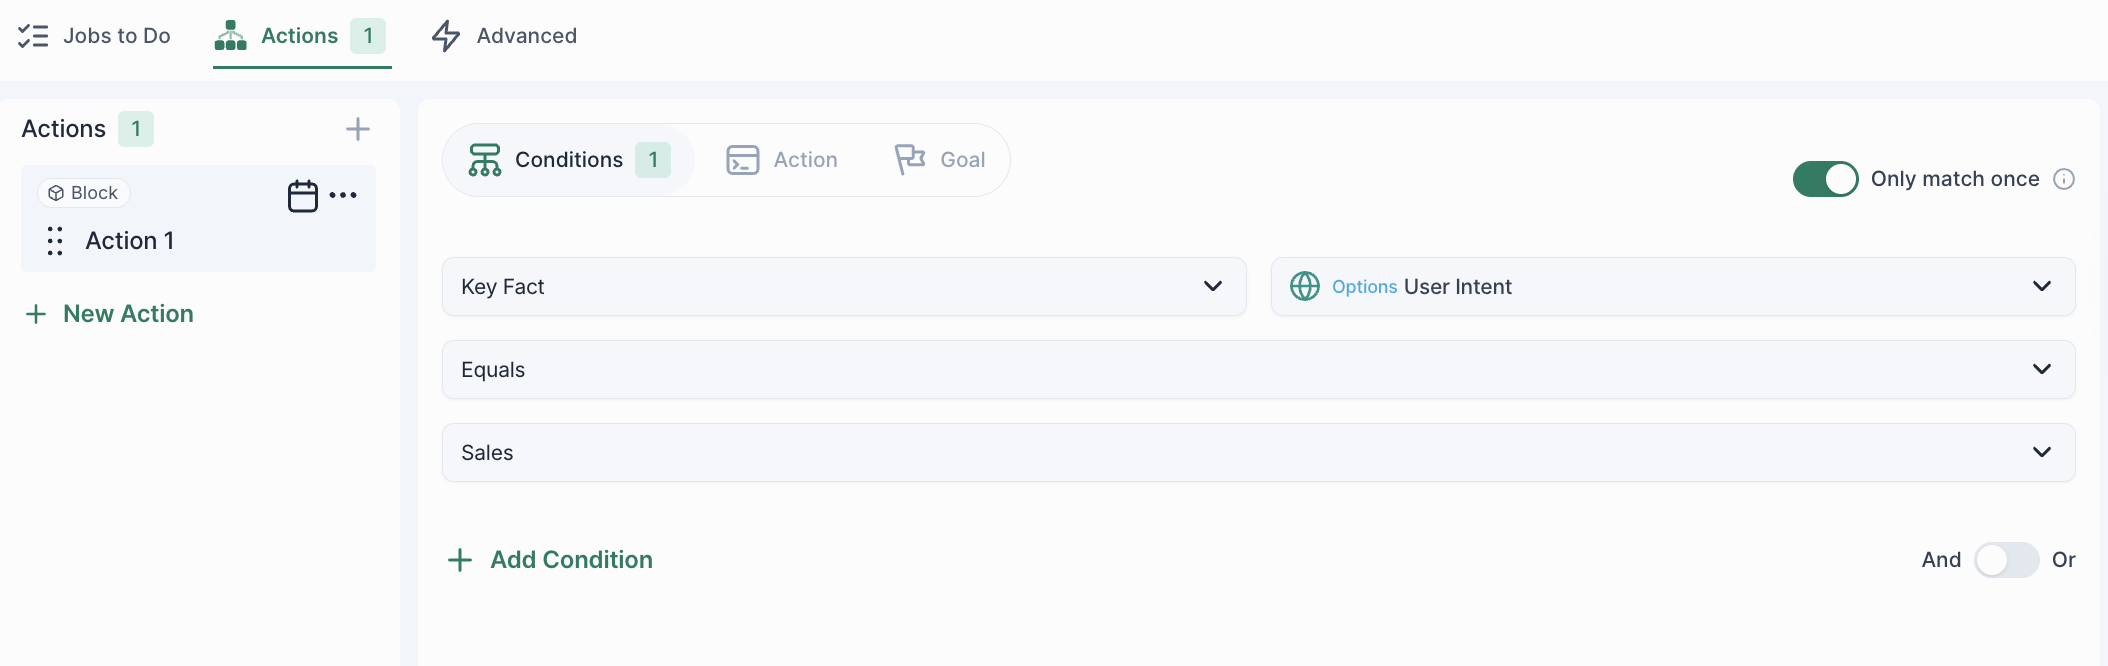
Step 4: Configure Actions
After selecting Conditions, click on “Action”. Select “Add Calendar” from the list of available actions.
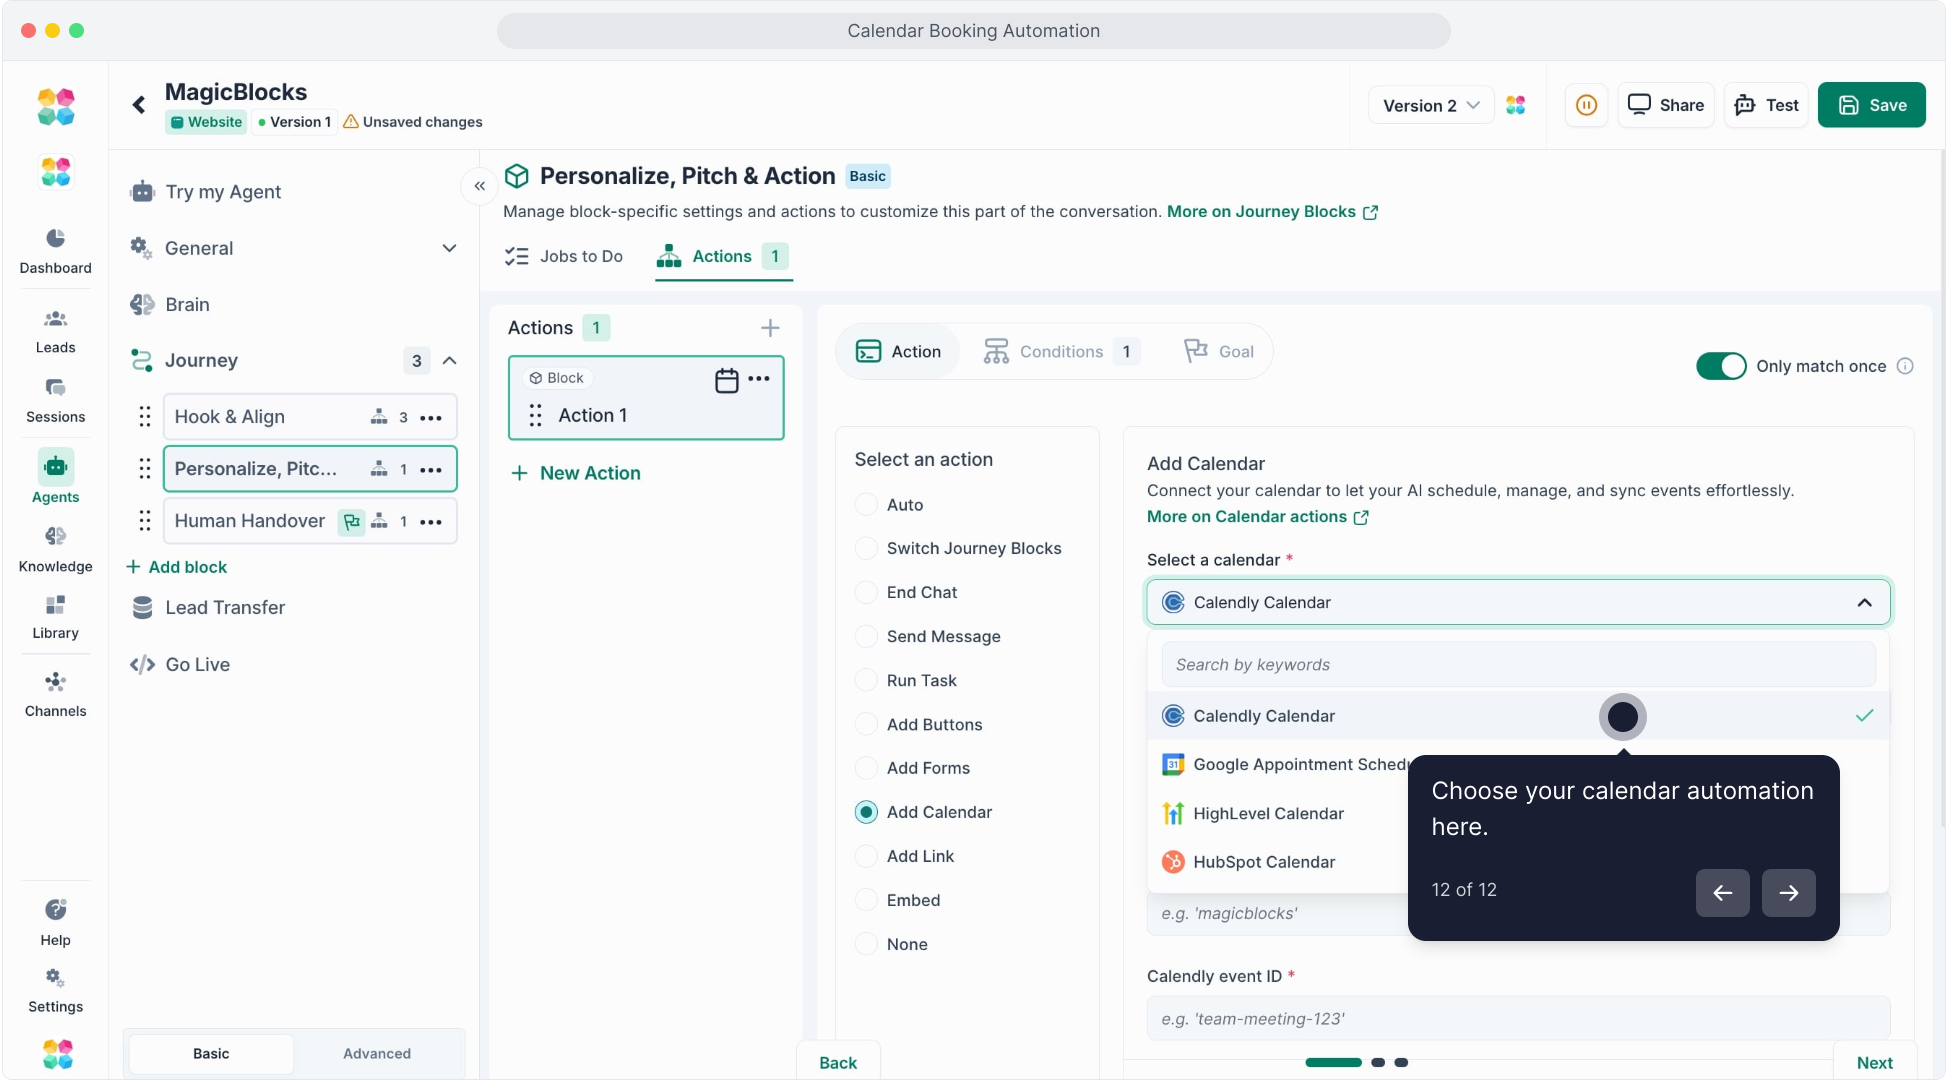
Step 5: Add Calendar Integration
Choose “Calendly Calendar” as the integration type.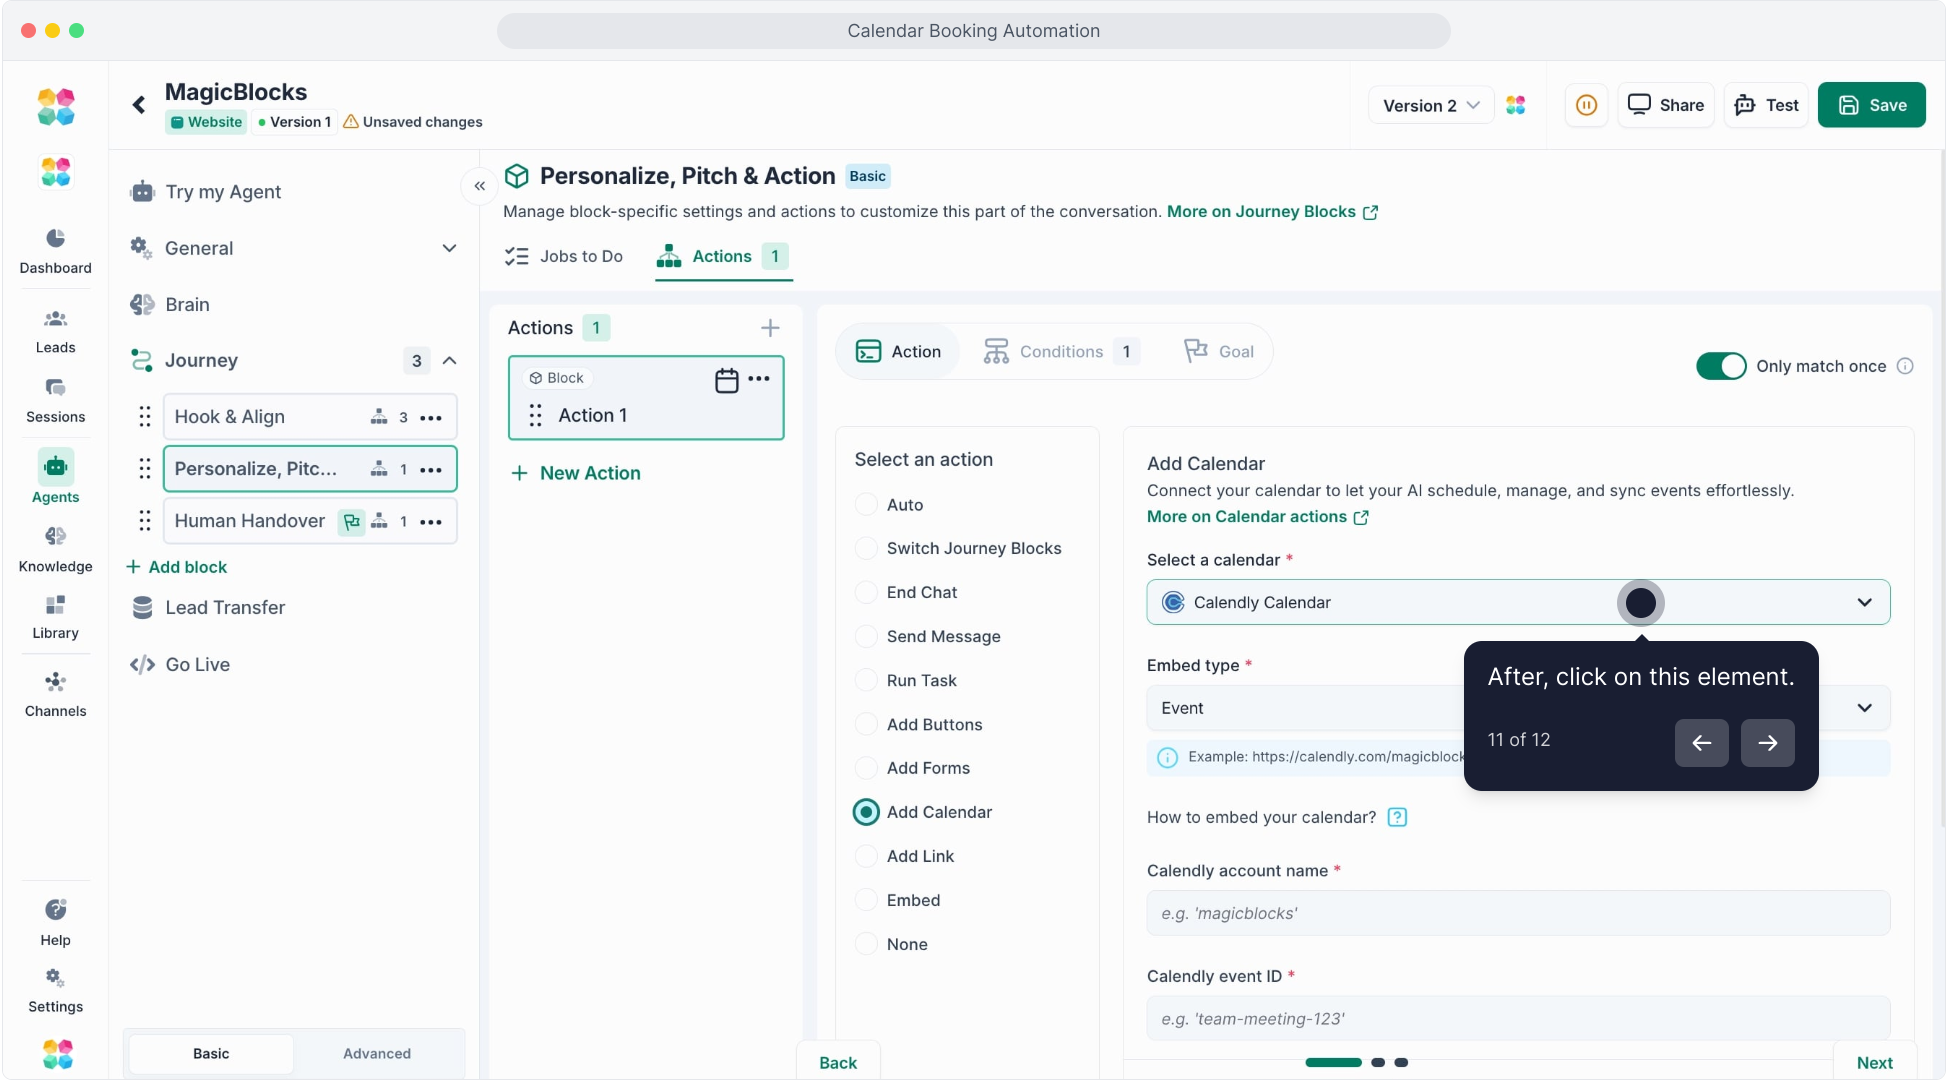
Step 6: Choose Your Event Type
Click on “Event” to select what type of meeting should be scheduled.
Step 7: Retrieve Your Calendly Link
Open Calendly and go to your event settings.
Click “Copy link” to get your scheduling URL.
URL format: https://calendly.com/AccountName/EventID.
Step 8: Enter Your Account Details
In MagicBlocks, paste your Calendly Account Name in the required field.
Enter the Event ID from Calendly.
Step 9: Test Your AI Agent
Click “Test Agent” to simulate a scheduling request.
Check that the AI correctly provides available time slots.
Click here to watch the tutorial video:
Now, let your AI Agent take over scheduling and never miss a meeting again!