
Connect to Calendly
Scheduling meetings manually can be inefficient, leading to missed opportunities and wasted time. MagicBlocks AI Agent enables automated appointment booking, ensuring instant engagement and frictionless scheduling. This tutorial will guide you through the exact steps to integrate a scheduling system into your AI Agent using Calendly as an example.
Why Automate Calendar Appointments?
✅ Speed to Lead – Respond to leads within seconds, increasing conversion rates.
✅ Seamless User Experience – Allow leads to book instantly without back-and-forth emails.
✅ No Manual Scheduling – AI takes care of appointment setting, freeing up sales teams for high-value interactions.
MagicBlocks supports:
- Calendly
- Google Appointment Schedule
- HighLevel Calendar
- HubSpot Calendar
💡 Strategic Setup: Where This Fits in Your Blocks
When designing your AI Agent, calendar scheduling should not be offered too early. Instead, you want the AI to:
Qualify the lead → Do they meet your basic criteria (e.g., budget, role, intent)?
Build interest and deliver value → This can happen in the Pitch block.
Offer a call at the right moment → When key facts are collected or intent is confirmed.
📍 Recommended Block Setup:
Block Name: "Schedule Meeting" or "Book a Call" or included in “Personalize, Pitch, Action” Block.
Trigger Points:
A user types “book a call,” “talk to someone,” or “schedule a meeting.”
All key facts are collected (e.g., lead shows intent + fits target persona).
It’s the final call-to-action after a successful pitch.
This ensures the AI Agent feels smart and intentional, not pushy or robotic.
Step-by-Step Guide to Setting Up Calendar Appointment Automation
Step 1: Access Your Blocks
Log in to MagicBlocks and select your AI Agent through Agents.
Click on one of your Journey Blocks (e.g., “Meeting” or “Appointment Scheduling”).
This allows you to modify how the AI Agent responds when users request a meeting.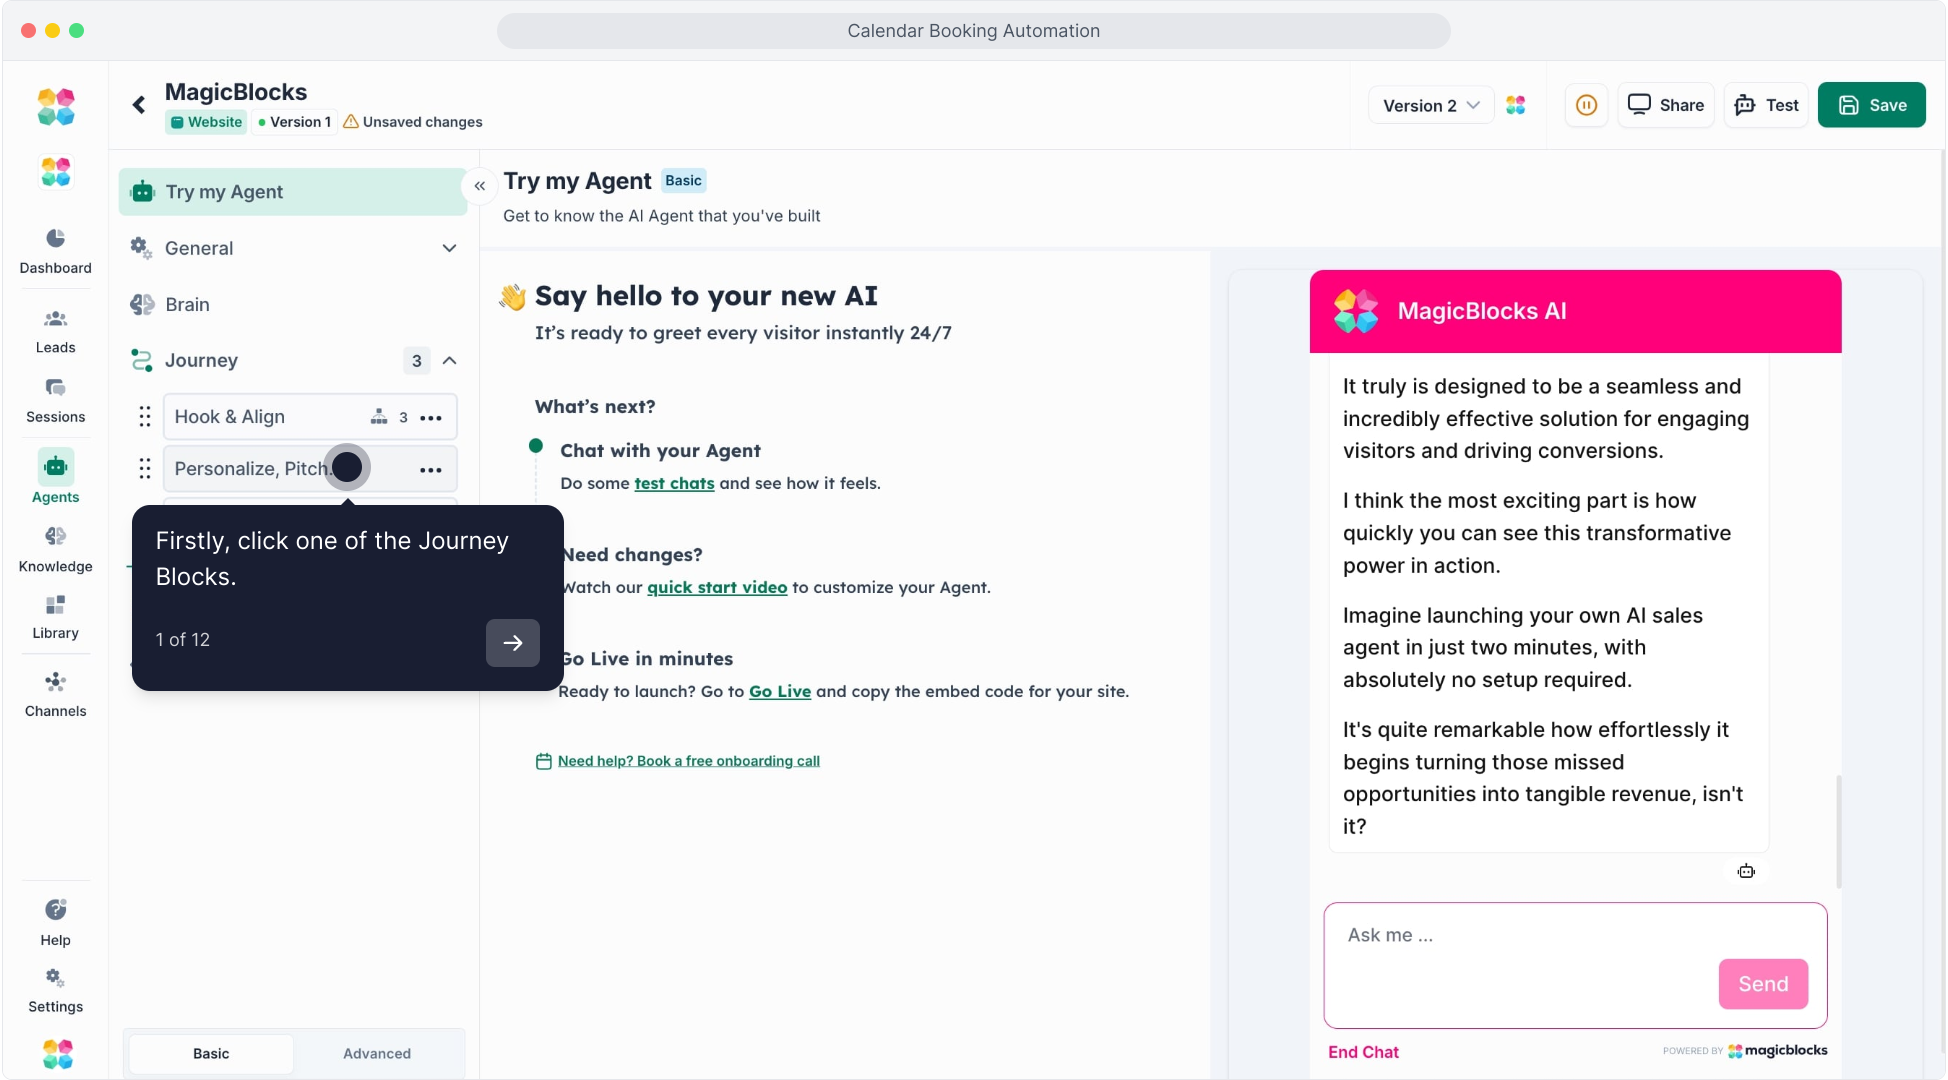
Step 2: Navigate to the Actions Section in the Block
Click on “Actions” in the selected Block.
Actions control when and how your AI schedules an appointment.

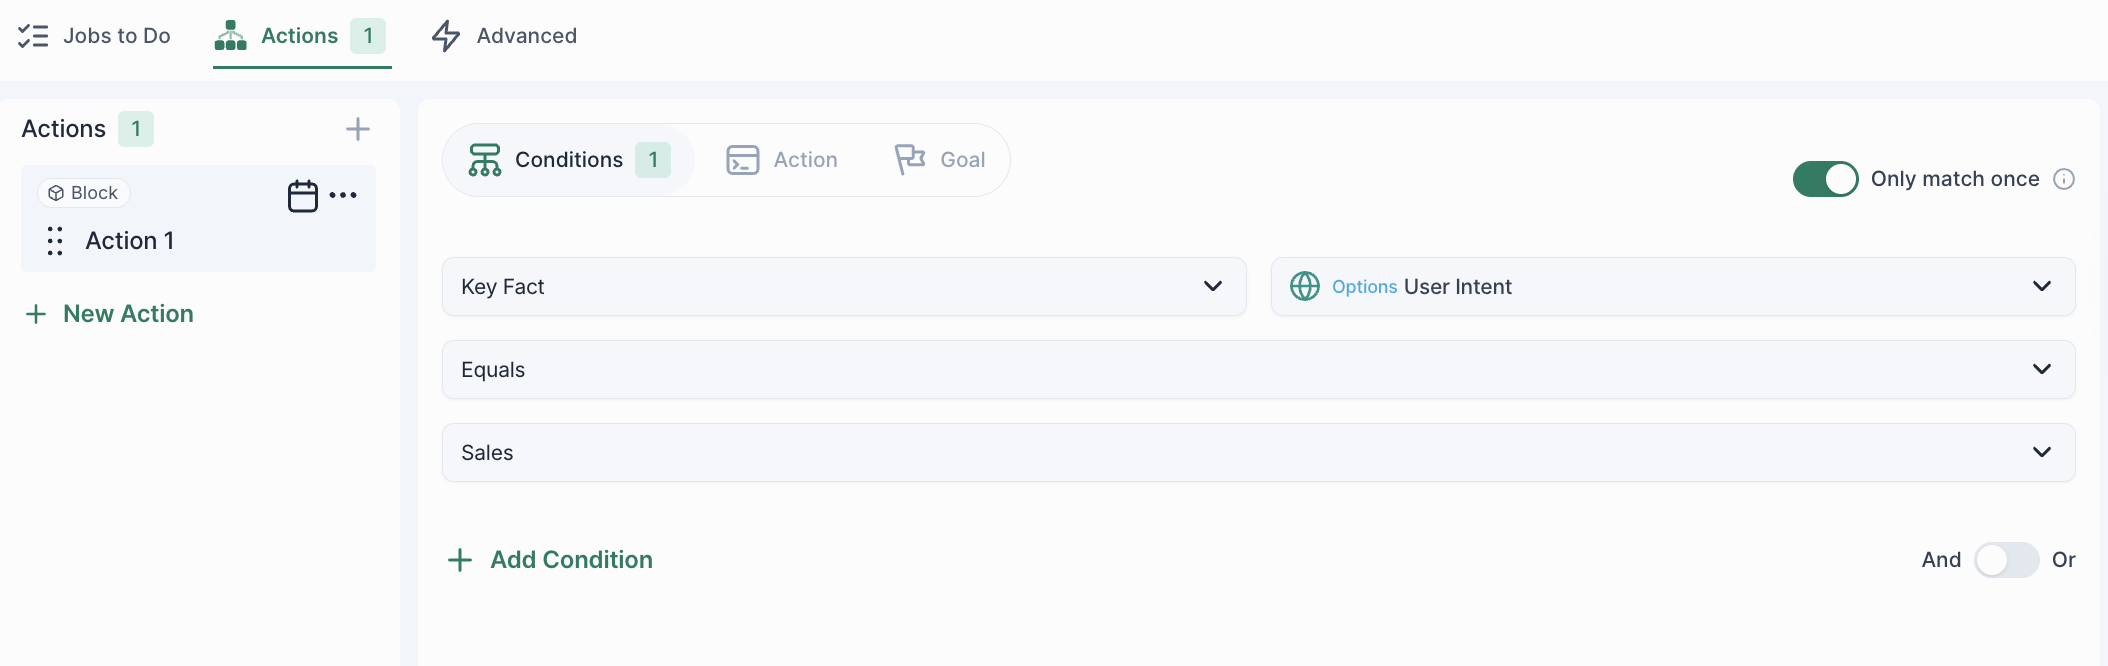
Step 3: Set Up Scheduling Conditions
Define when your AI should trigger the booking action, such as:
- A user message contains “meeting,” or “talk to sales.”
- Specific Call-to-Action (CTA) in the Pitch block.
- All key facts are found and the lead meets qualification criteria (e.g., company size, budget, intent).
Step 4: Configure Actions
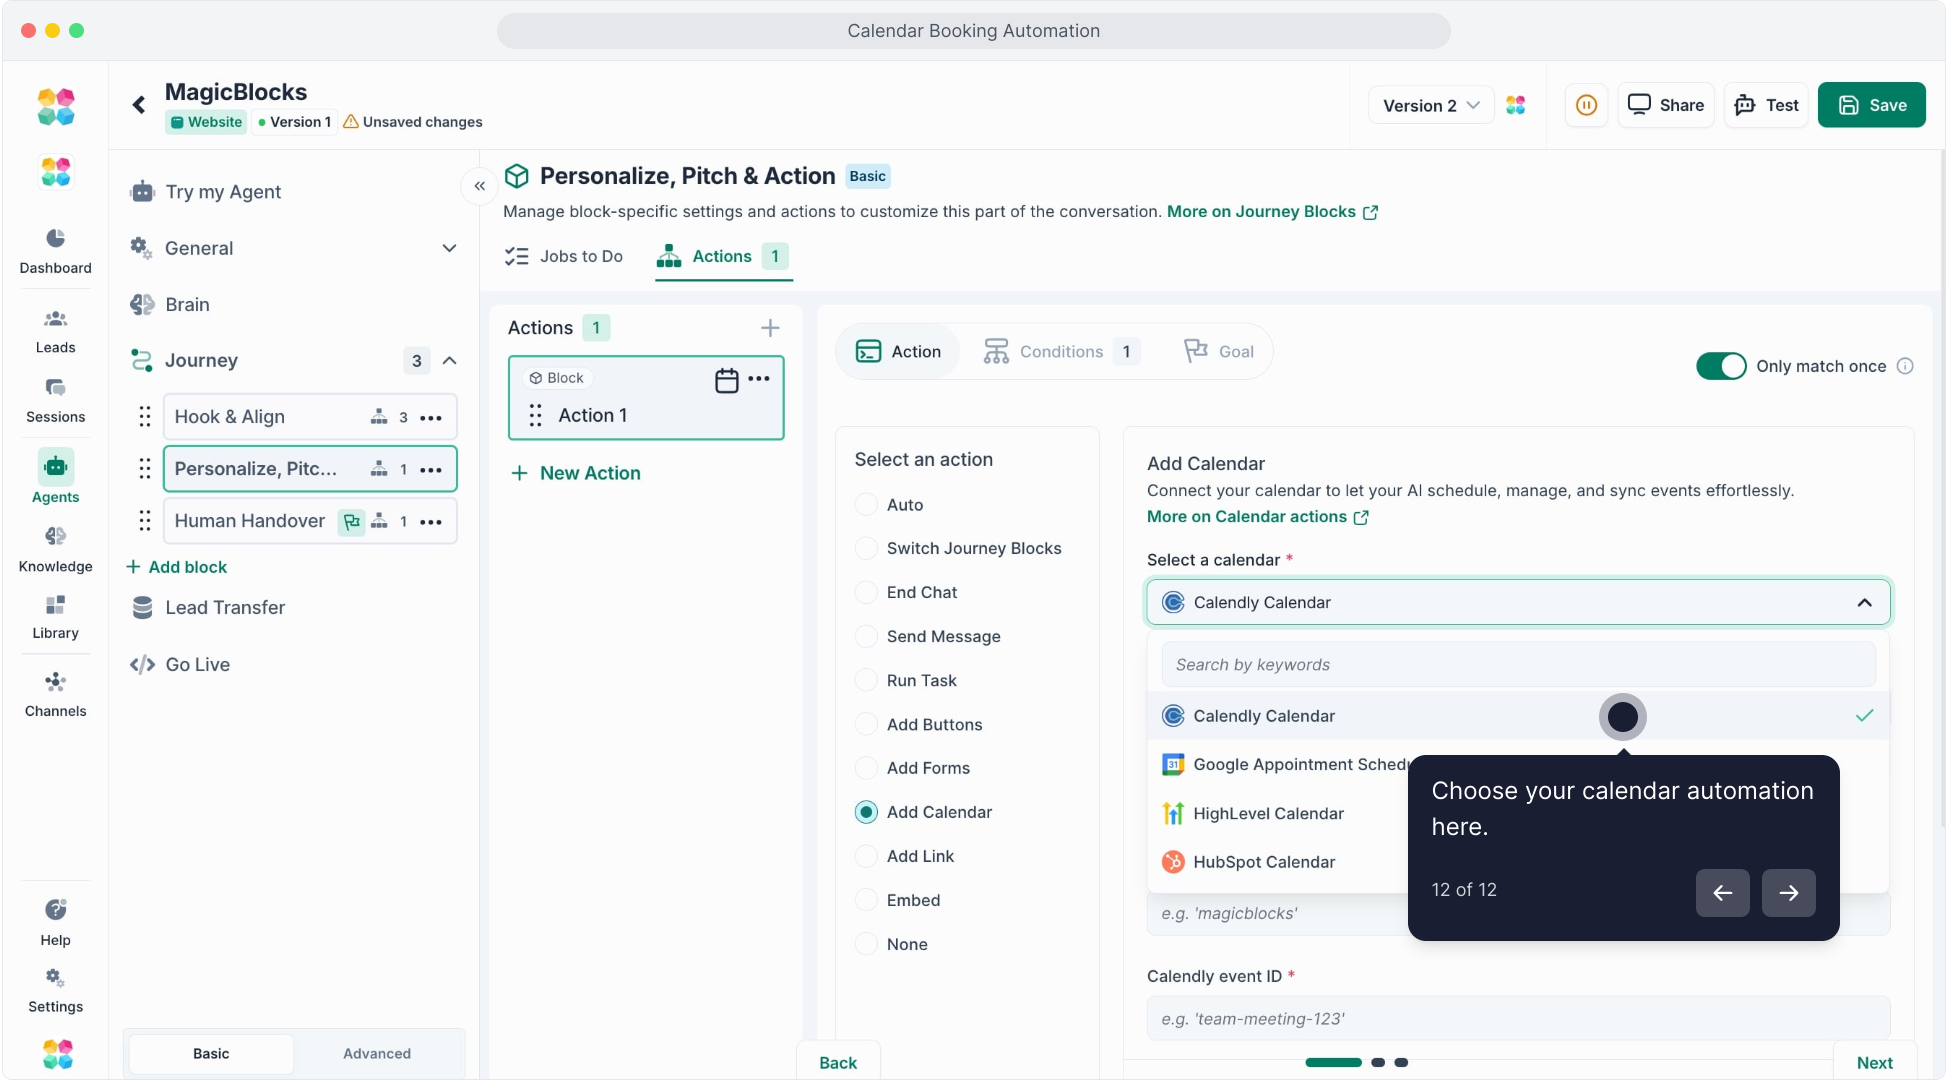
After selecting Conditions, click on “Action”. Select “Add Calendar” from the list of available actions.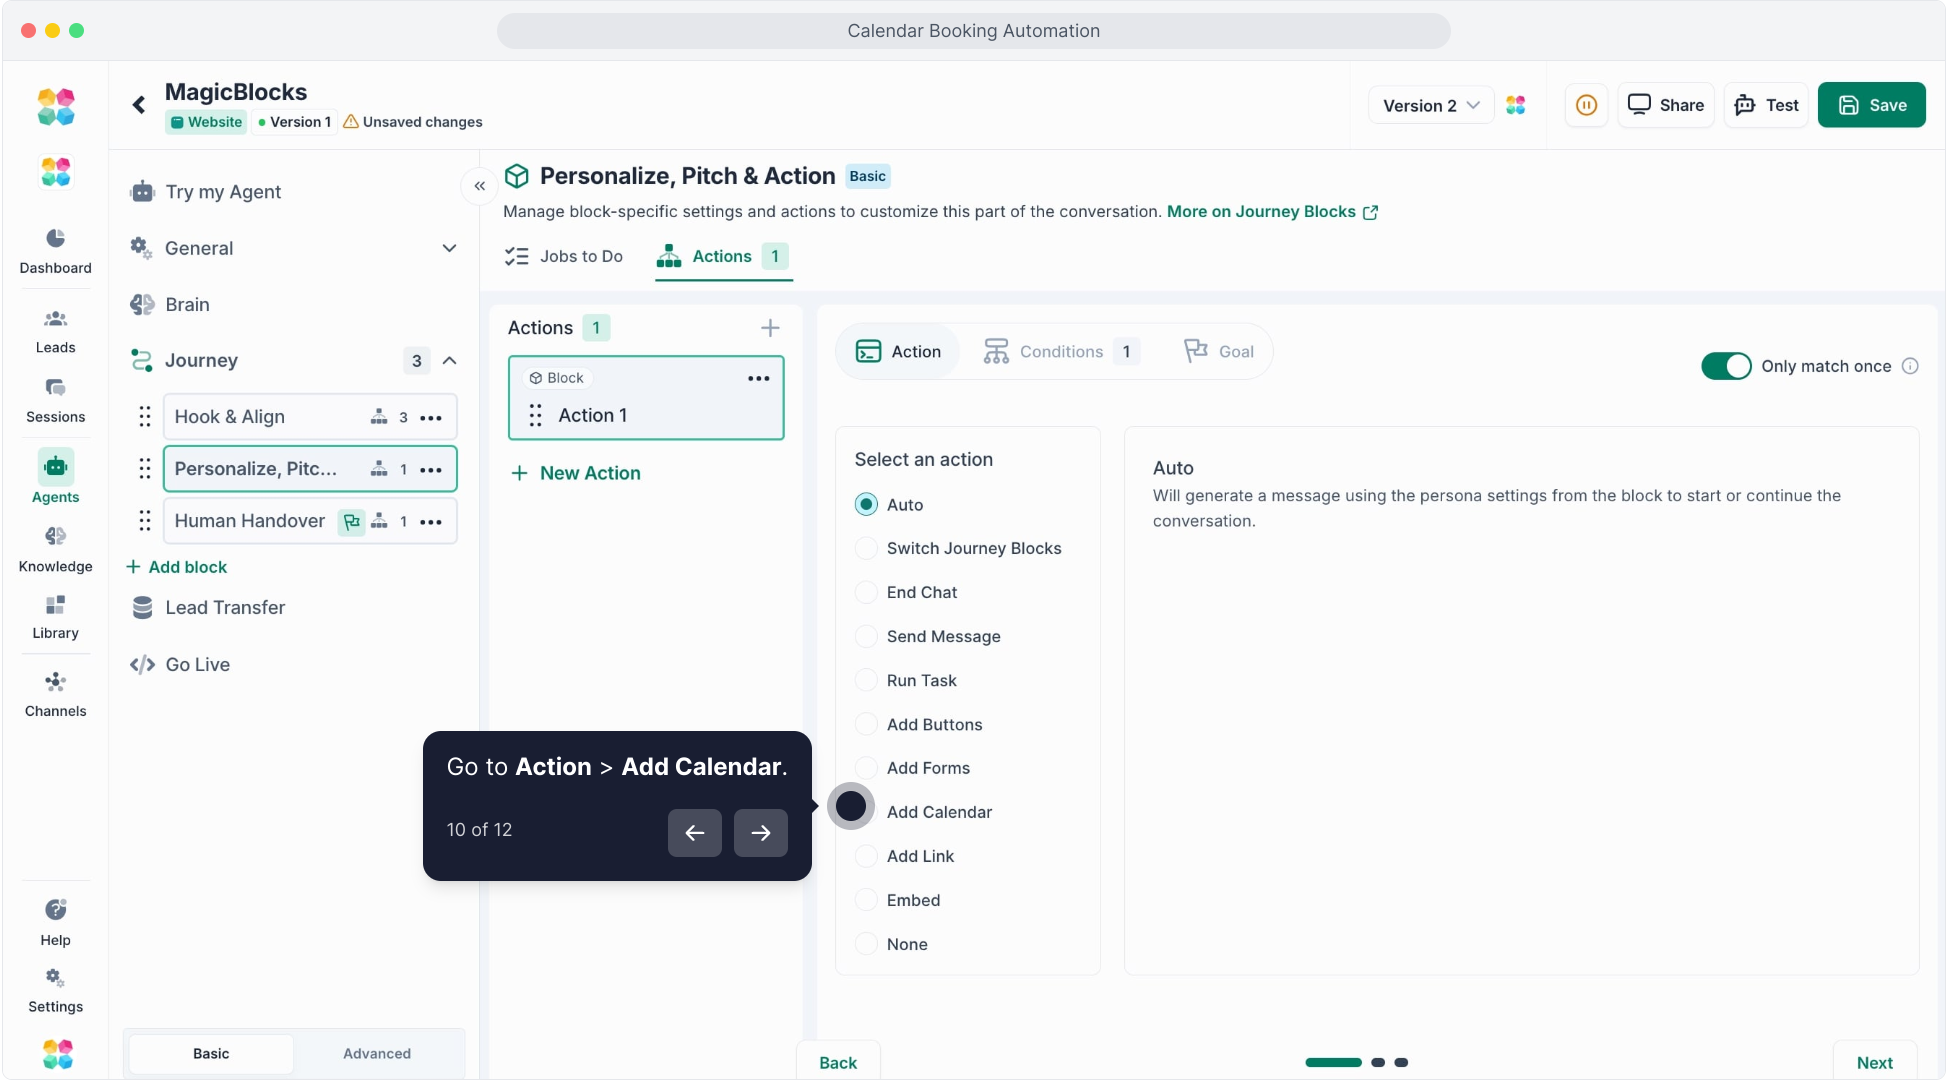
Step 5: Add Calendar Integration
Choose “Calendly Calendar” as the integration type.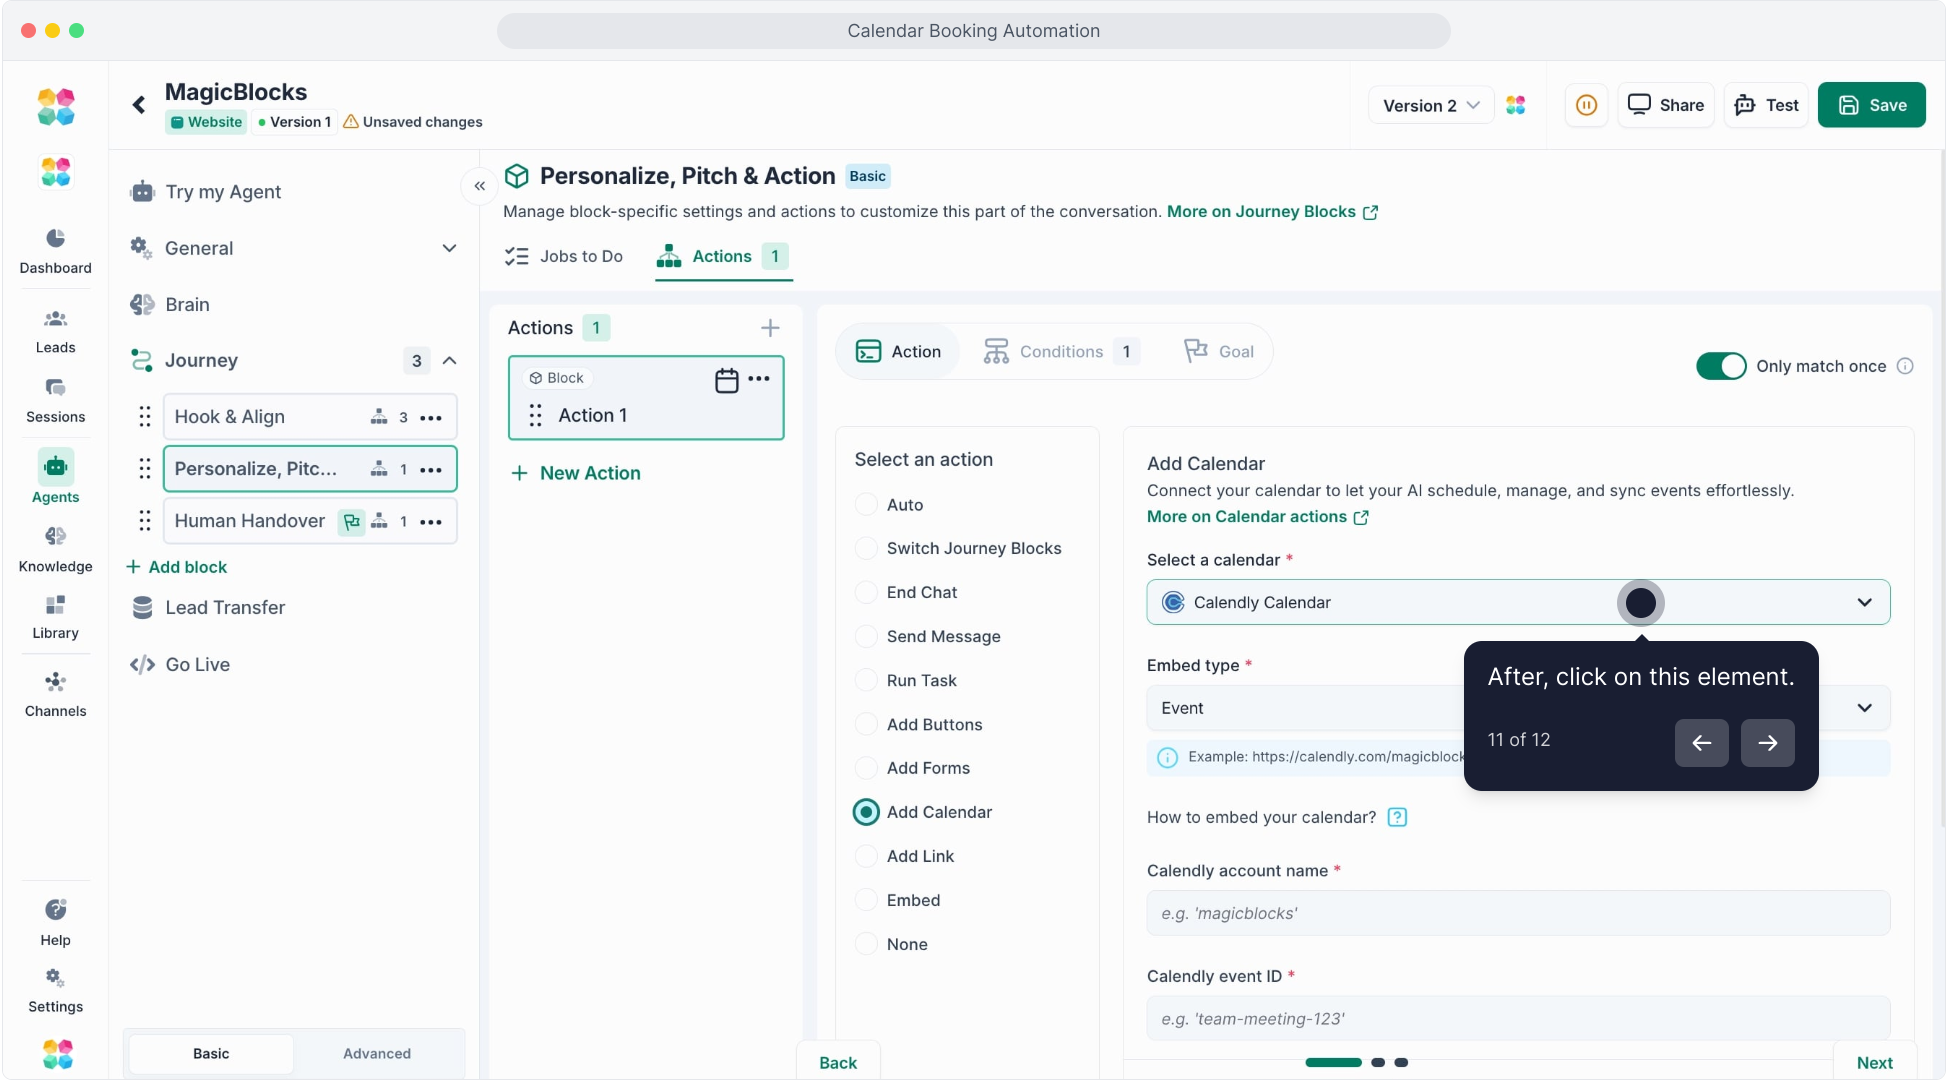
Step 6: Choose Your Event Type
Click on “Event” to select what type of meeting should be scheduled.
Step 7: Retrieve Your Calendly Link
Open Calendly and go to your event settings.
Click “Copy link” to get your scheduling URL.
URL format: https://calendly.com/AccountName/EventID.
Step 8: Enter Your Account Details
In MagicBlocks, paste your Calendly Account Name in the required field.
Enter the Event ID from Calendly.
Step 9: Test Your AI Agent
Click “Test Agent” to simulate a scheduling request.
Check that the AI correctly provides available time slots.
Now, let your AI Agent take over scheduling and never miss a meeting again!